Taking an Image from Dull to WOW Using Just the Basic Panel and Graduated Filters in Lightroom
During our recent getaway to Camp Cobark, I had the opportunity to take photos near Barrington Tops National Park at dawn.
I used the mirrorless FUJIFILM X-T1 and the XF56mm f/1.2 lens, which I love and use all the time. It has a beautiful shallow depth of field when wide open and does a great job at getting the autofocus correct. Technology has improved over the past few years and it rarely focuses incorrectly.
Watch as I demonstrate how to take a dull, lifeless scene to the majesty this horse at dawn deserves.
Watch this video
In this episode:
(00:25) – Before and after image of the horse
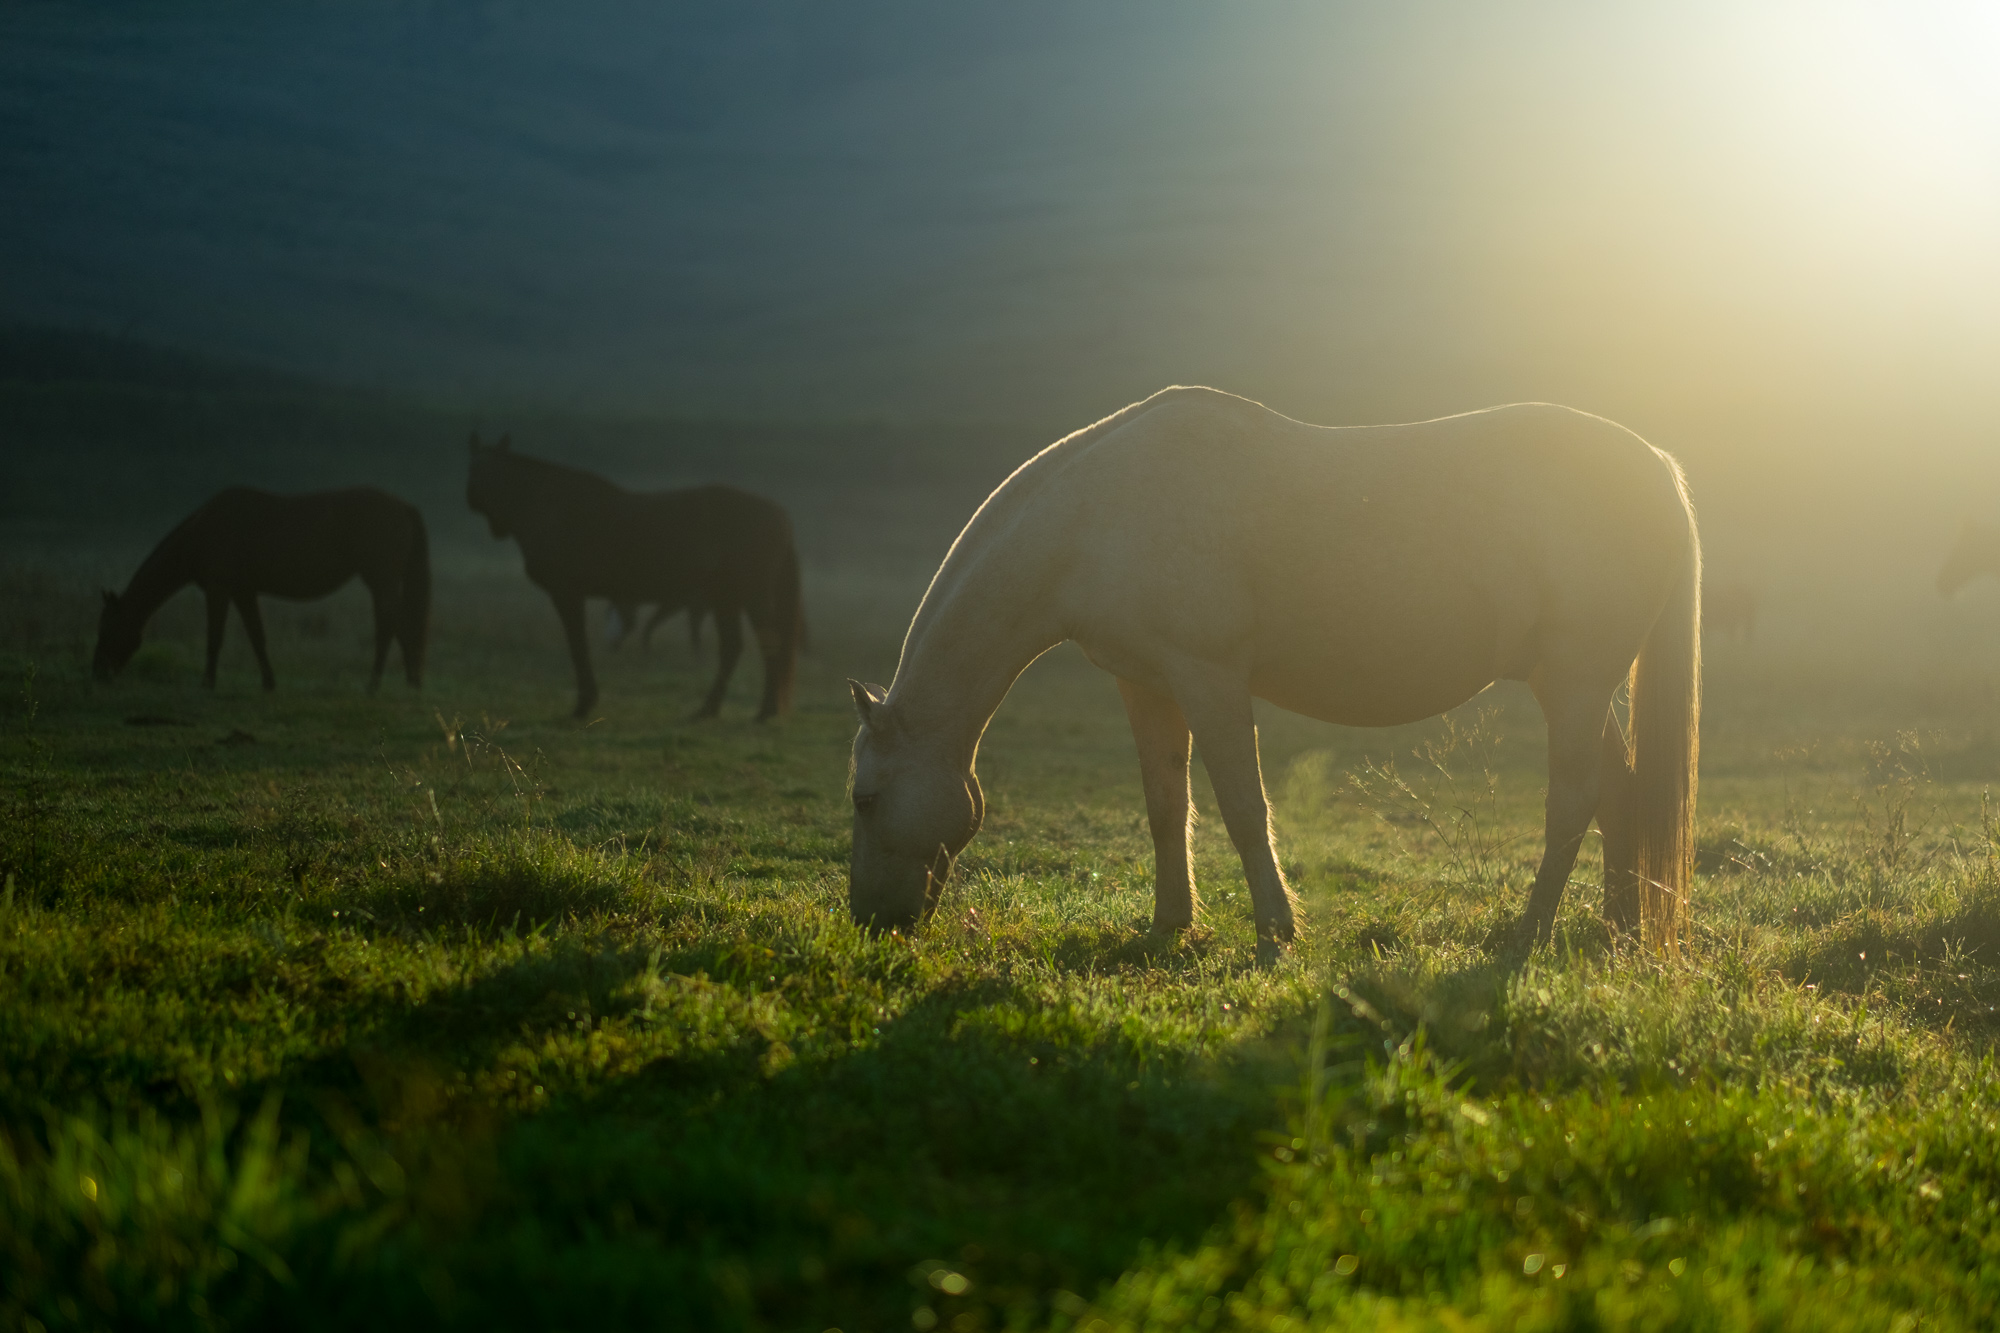
(00:42) – Original image of the horse
(01:47) – How to post process an image
(03:50) – Things needed to edit in the image
(04:23) – Editing the background
(05:32) – Editing the foreground
(07:17) – Editing the sun
Challenges of Shooting into the Sun
I had a few challenges to overcome with this photo. Not only did I take it first thing in the morning, shooting into the sun, I also had a fence as a barrier and had to bend down to capture the image I wanted.
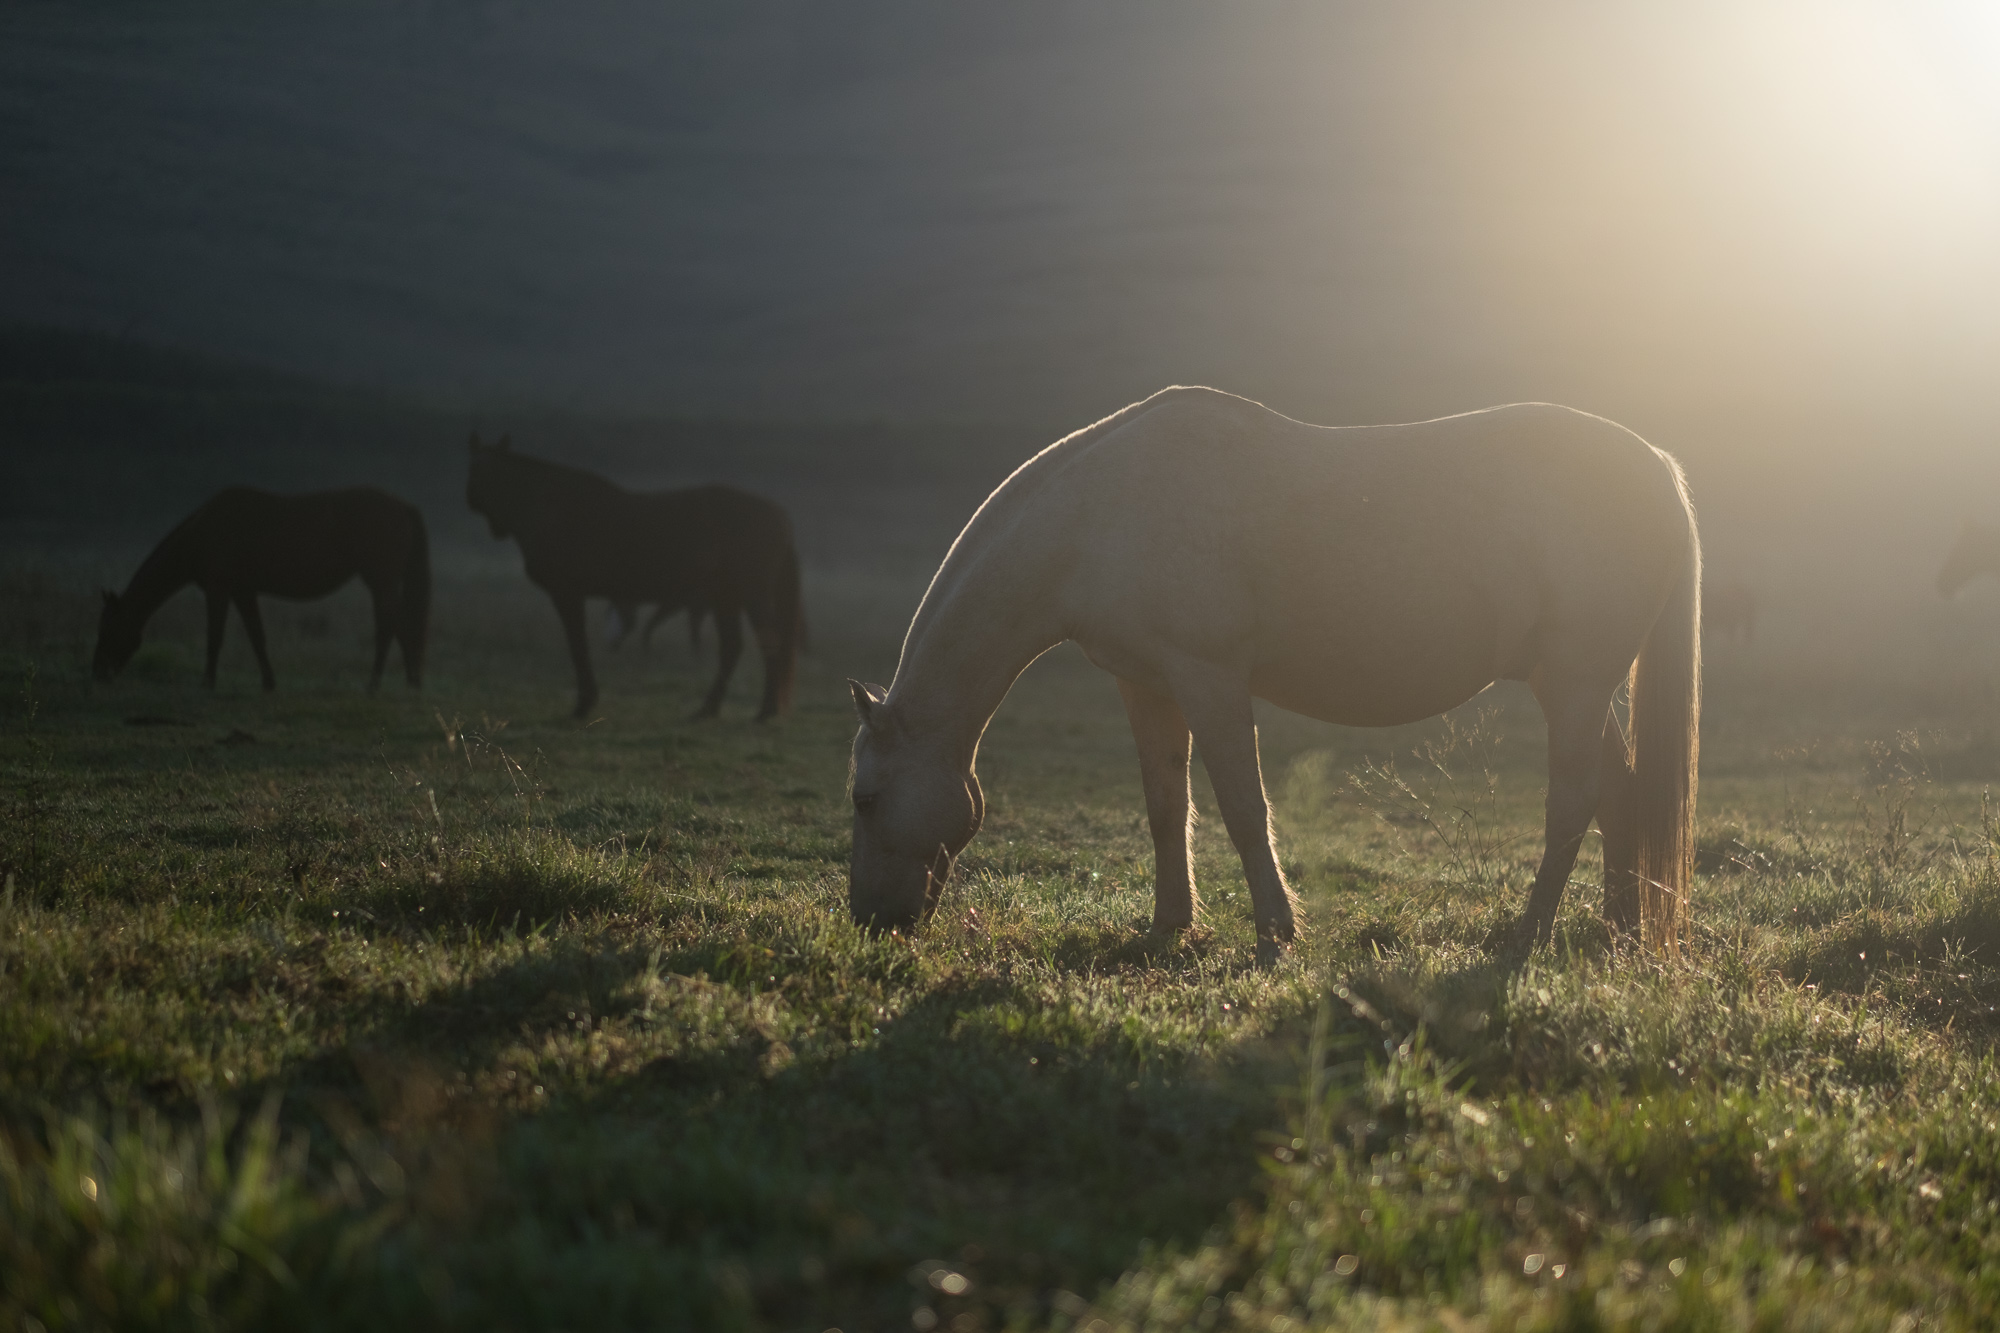
Because I shot into the sun, there are bright highlights in the upper right corner of the image, but this allowed me to capture the dew sparkling in the sunlight as well as get a nice backlight on the horse.
Here is the image straight out of camera. The white balance is affected by the bright highlights and the color is not as lush and vibrant as it was in reality.
Adjust White Balance to Bring Back Real Life Color
The picture is a nice image as shot, but you’ll notice that it looks a little dull.
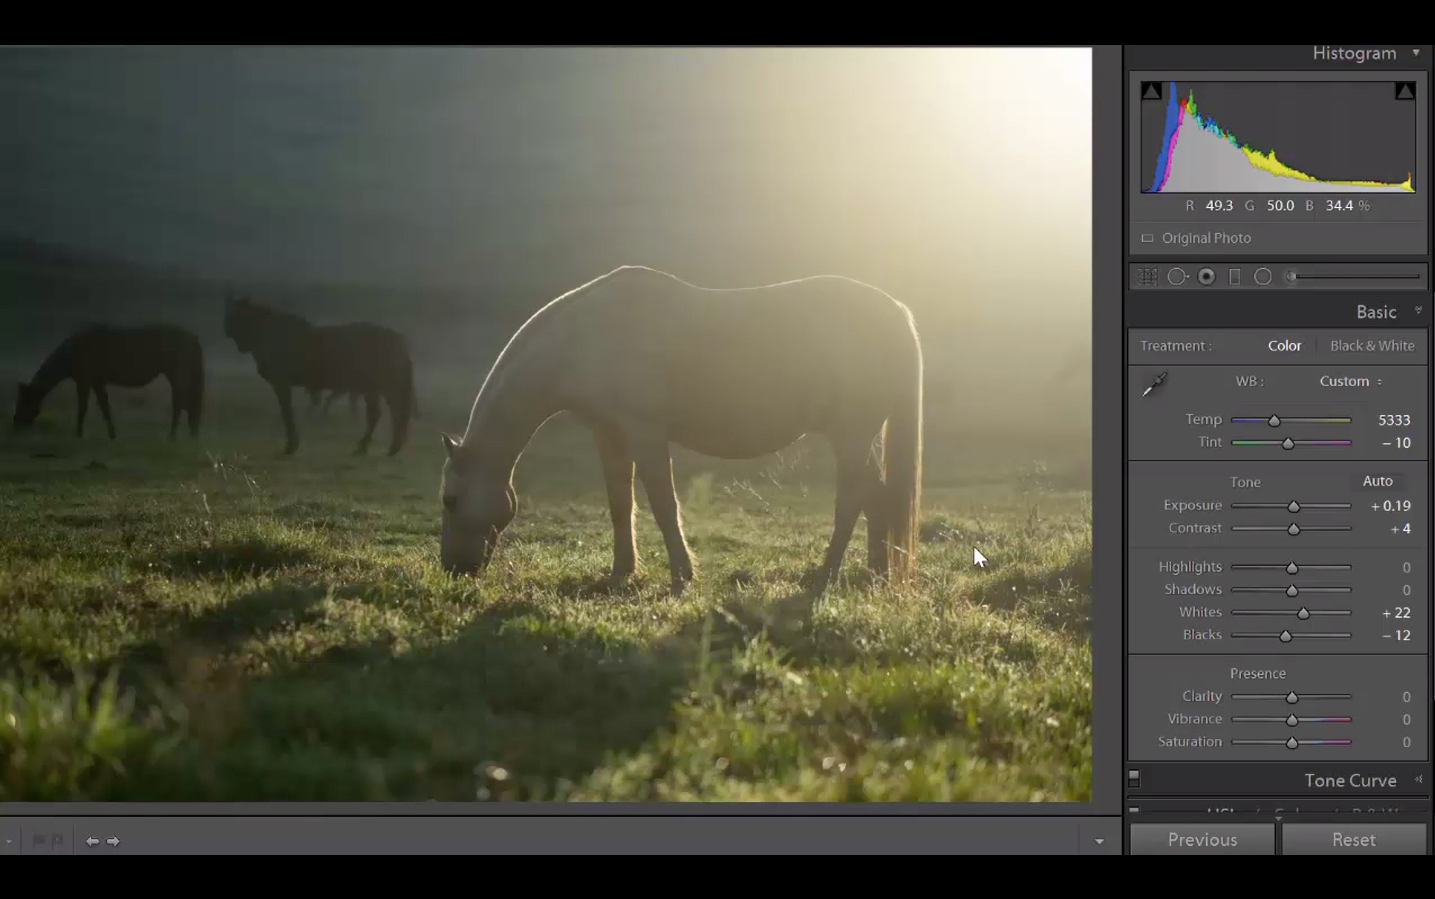
To bring back the color of the scene, I needed to start with adjusting the white balance. I clicked the Auto button but that didn’t quite give me the effect I wanted, so I experimented with some of the other options.
Daylight worked well as a starting point, but I wanted to further refine it, so I manually adjusted the temp and tint sliders from there until the image matched the green I remember.
Next, I adjusted the exposure and contrast slightly, and then set the white
and black points.
QUICK TIP: If you hold down Shift and double click on the whites and do the same on the blacks, Lightroom will correct those settings automatically. As you can see, it makes a noticeable difference! You may want to tweak those sliders slightly as I did with the blacks.
Taking it to the next level
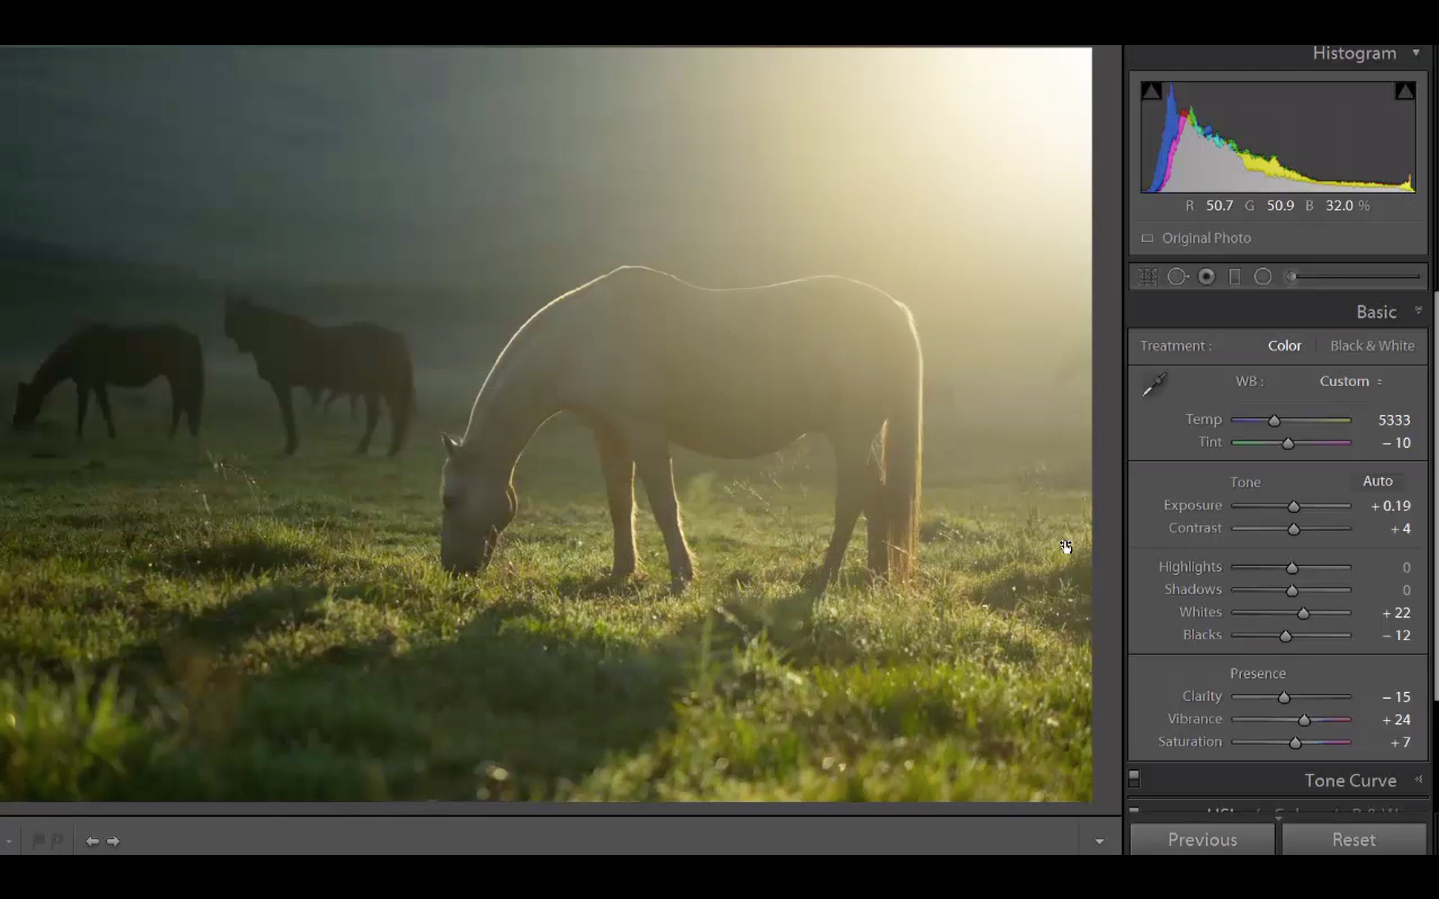
Although the previous adjustments made a huge difference, the image still wasn’t where I wanted to see it. It was such a beautiful, fresh morning and I really wanted to emphasize that feeling.
So I made a few more adjustments; I cranked up the vibrance quite a bit and adjusted the saturation just a little and ended up with something much closer to what I had in mind. I didn’t want the image to be too clear, which can sometimes make it too harsh, so I opted to decrease the clarity slightly.
Finishing Touches: Adding Graduated Filters for Emphasis
The photo was looking a lot better, but the brightness of the sun was still bothering me. I also wanted to make the mountain background cooler, as they often have a blue cast in reality, and I wanted to make the green grass really stand out as well. I accomplished this in two steps: adding a graduated filter for the background and another for the foreground.
Background Graduated Filter
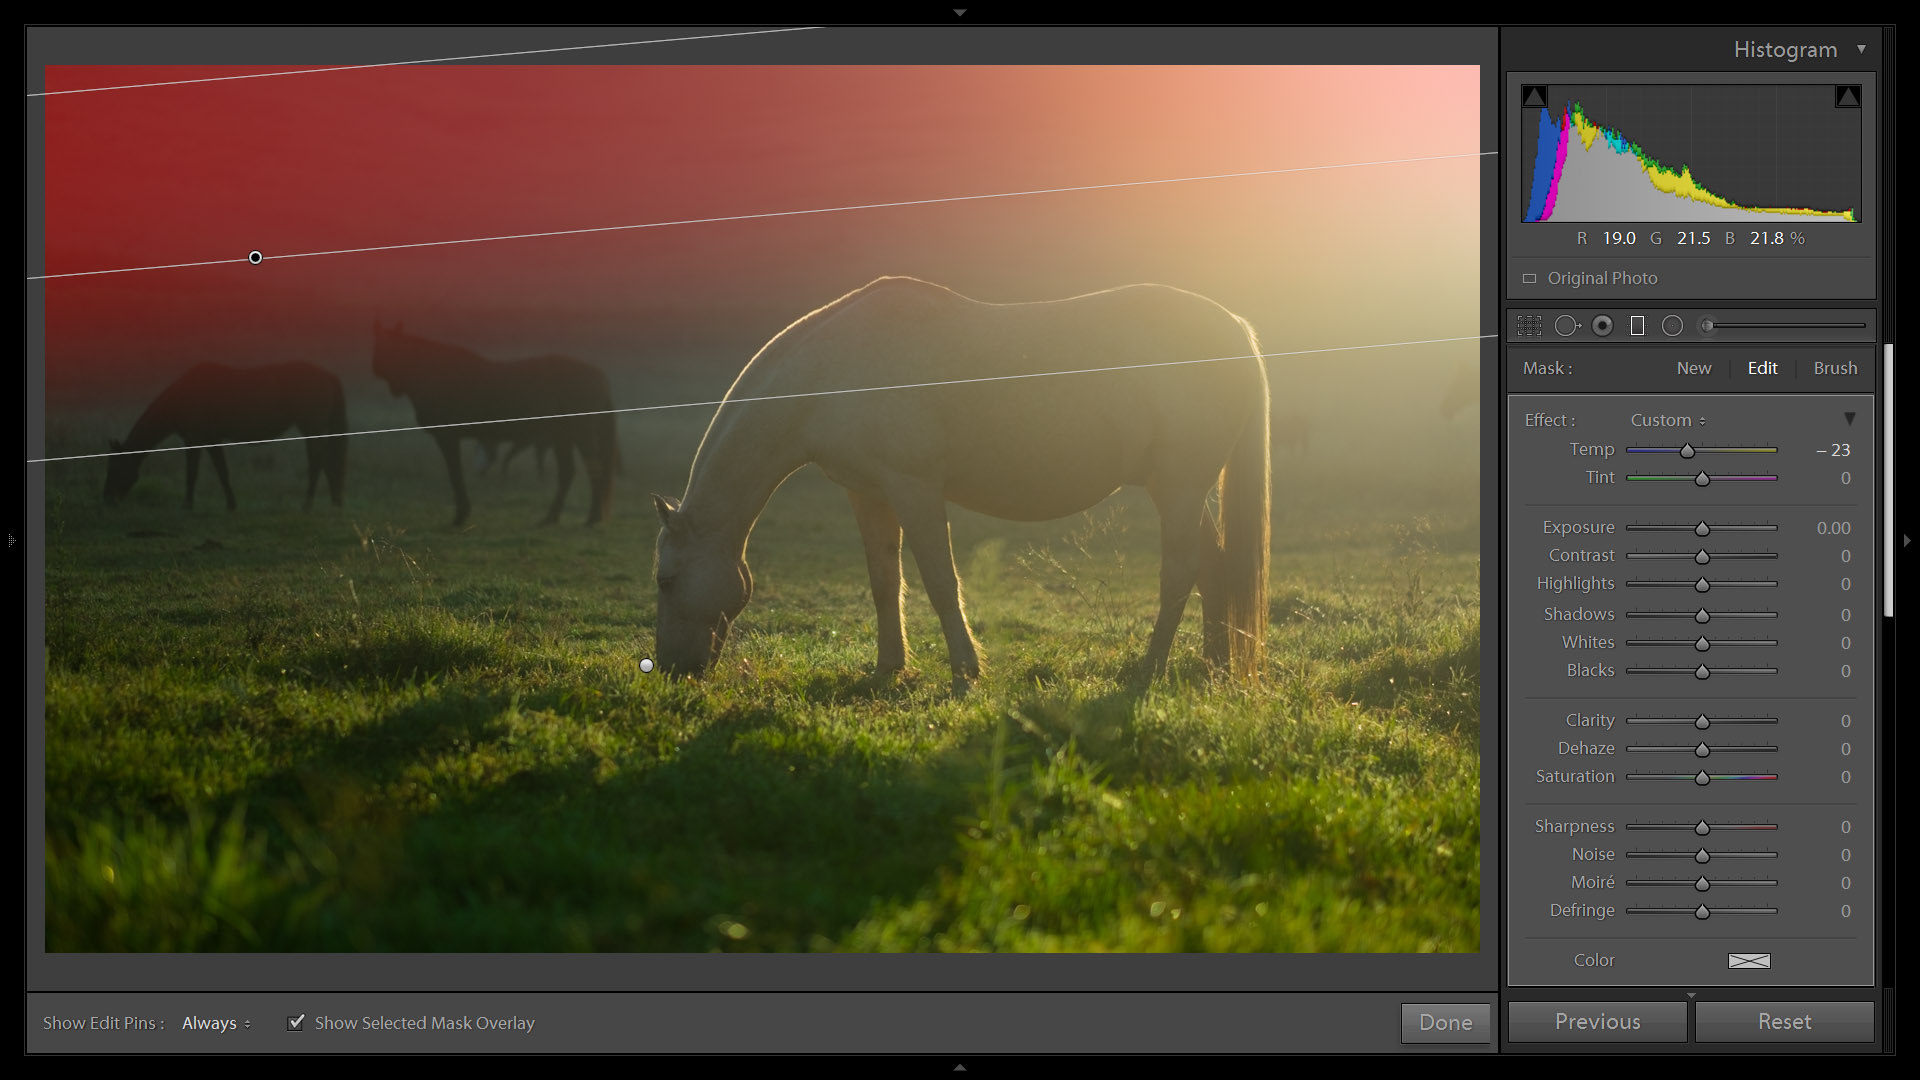
I added a graduated filter from the upper left corner and across the image at a slight angle that covered just the mountains. Notice that you can check the area to be affected by filters by applying the mask overlay, which displays a red mask. Once I adjusted my mask, I switched the overlay off and cooled off the area with the temp slider.
Foreground Graduated Filter
Next, I created a separate filter for the foreground. I added this one from just left of center and up at a slight angle, covering the grass. I played with the exposure, shadows, and blacks and made very small adjustments to those sliders until the image had the look I was going for.

Because the foreground was already out of focus, I wanted to decrease the clarity even more to keep the almost mystical feel intact.

Summing it all up:
You can see that by making simple edits in the Basic Panel, you can truly transform an image from dull to rich and vibrant. Adding just a couple of graduated filters allows you to add color and make other adjustments to very specific areas of a photograph. This really lets you take your images to the next level.
1. Correct white balance – warm it up with Daylight
2. Refine with temp and tint sliders
3. Increase contrast and exposure
4. Set white and black points
5. Crank up vibrance and increase saturation
6. Reduce clarity
7. Add graduated filter for background and cool the temp
8. Add graduated filter for foreground and adjust tint
Your Feedback Wanted:
What challenges have you had working with dull images in Lightroom?
Let me know in the comments section below. I’d love to hear your stories!
Want to learn more about image editing and post processing?
Grab My FREE Post-Processing Course
Please leave me a comments below. Brent
I have a few images to try this out on tomorrow, and one of my favourite subjects to photograph 😉
Glad you liked it. B
Hi Brent,
Thanks for this series. Calm, collected delivery, great content and some lovely photography all come together to make this site one of my regulars.
I don’t use lightroom, but your delivery and demonstrations are clear enough that the process you use is applicable to my editing program (Darktable).
Oh and I just love back-lit shots, so double win today 🙂
Thanks
Shane
Thanks Shane for your feedback. Cheers, Brent
Great post Brent – I find your delivery very clear and relaxed and consequently easy to follow and keep up with. I would be keen for you do do some post processing on a few portrait images. Cheers.
Mike
Thanks Mike