Learn to use a powerful composition technique to make your subjects stand out!
Hey guys! Brent here with another quick tip for you: Framing!
This week I want to show you how you can use a super simple technique called framing to add some serious punch to your composition in no time! To learn all about framing, have a look at the video below.
In the video, I use several case studies from recent travels overseas to demonstrate how this technique can make a big difference in your photos. You will definitely kick them up a notch with this simple step, taking them from snapshot to masterpiece in a matter of seconds.
I also wanted to let you know that all my tutorials will soon be live on my newly launched website, shareinspirecreate.com. You will find my latest posts, interviews, tutorials, and photography courses there too. It is beautiful and I’m very happy with how it turned out. Please be sure to check it out and let me know what you think.
In this episode
(00:48) – Case Study: Bali Ocean
(03:09) – Case Study: Philippines – Beach Comber
(04:08) – Case Study: Philippines – Cloud Nine Surfing Area
(05:13) – Case Study: Philippines – Carving at Restaurant
(07:40) – Case Study: Manila – Shaved Ice Trolley Vendor
Bali Ocean: Case Study #1
For this photo, I used my Canon 5D Mark III and 24-105 mm f/4 lens, set to 1/200th of a second, so I could handhold it and not have to use a tripod.
My friend Chris and I spent each day of our trip surfing the waves you see in this image. The area is called The Impossibles because it is almost impossible to catch a wave from one end to the other. But the challenge is worth it if you’re an experienced surfer.
I wanted to capture the entirety of The Impossibles, so I chose a vantage point near the pool that gave me the view I was looking for. I decided to use the two palm trees as my “frame” to direct the viewer’s attention to the ocean and waves below. The image is good as I took it, but felt I could make it even more powerful by cropping it in more. To do this, I used Lightroom. By the way, if you don’t have Lightroom or Photoshop, see the links below. I have done a deal with Adobe to get you into these programs for a special rate.
Using Lightroom to crop this image:
- Click the Crop Overlay tool in the panel on the right
- Drag the right edge of the crop overlay to just outside the tree
- Use the Angle tool to straighten the image. I did this by choosing a point on the horizon (which is the water, in this case) and dragging it along the water line to the right side. This shifted the image slightly to the left so that the horizon line is now straight
- Click the Crop Overlay tool one more time to commit the edits
You can see what a huge difference cropping just a little bit of the image made! It really focuses your attention on the waves and ocean below, which is what I wanted.

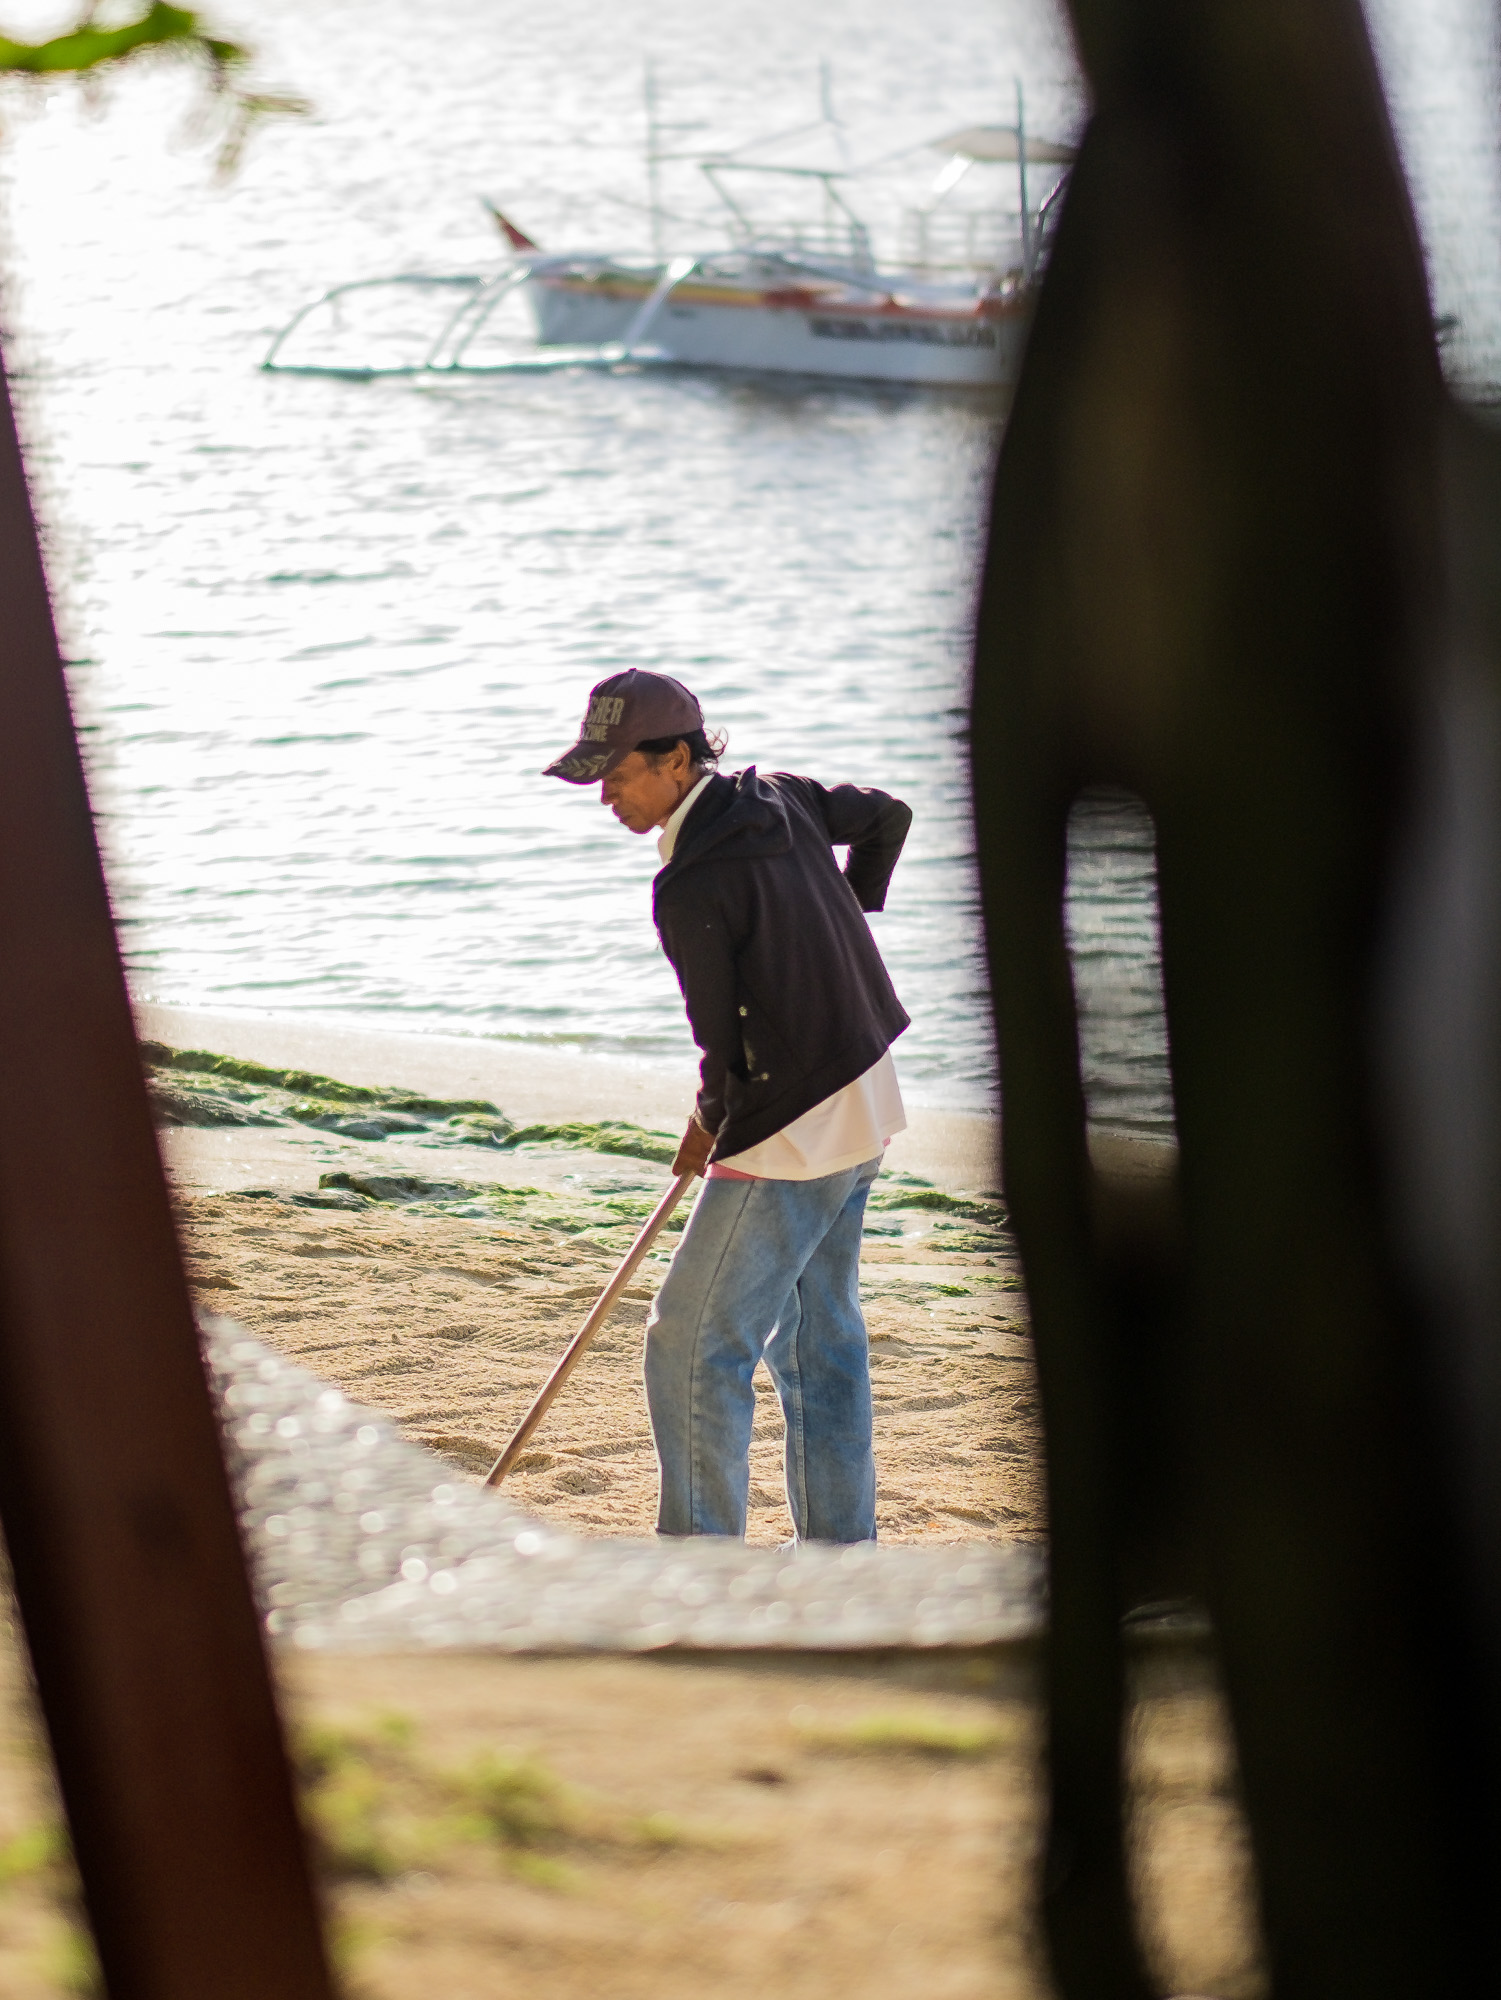
Philippines Beach Comber: Case Study #2
This image was taken on the beautiful island of Siargo in the Philippines. To get there, you must make a couple of intermediate stops before taking a small plane to the island.
I wanted to capture this guy preparing the beach early in the morning before the tourists arrived. I once again used the trees and bushes as a frame. Notice there is a boat and another dude competing for attention in the before picture. To eliminate these distractions and focus the attention on the beach comber, I followed the same steps as above, but cropped in from the left and the right. I also chose a portrait orientation, which I felt was more compelling for this picture.
Notice how the dark silhouetted wood refocuses your attention to the guy sweeping the beach.
Philippines Cloud Nine Suring Area: Case Study #3
Still on Siargo, this image was taken from the deck of a restaurant near the Cloud 9 suring area. It is interesting, but there is just too much going on for it to be great. The boat to the left, the waves to the right, all the pillars at different angles, and the island in the background are all competing for attention, so I needed to pick an area to focus on. This time, I chose the waves.
Since my subject was the waves, to frame this image properly, I cropped the right and left sides up to the pillars on each side of the waves. Then I cropped a little bit off the top and the bottom to help out with the composition.
Notice how removing all those other elements allows your attention to land on the waves, which are nicely focused. The island is there, but as a supporting element only, because it is slightly out of focus. It gives context without taking away from the subject of the waves.

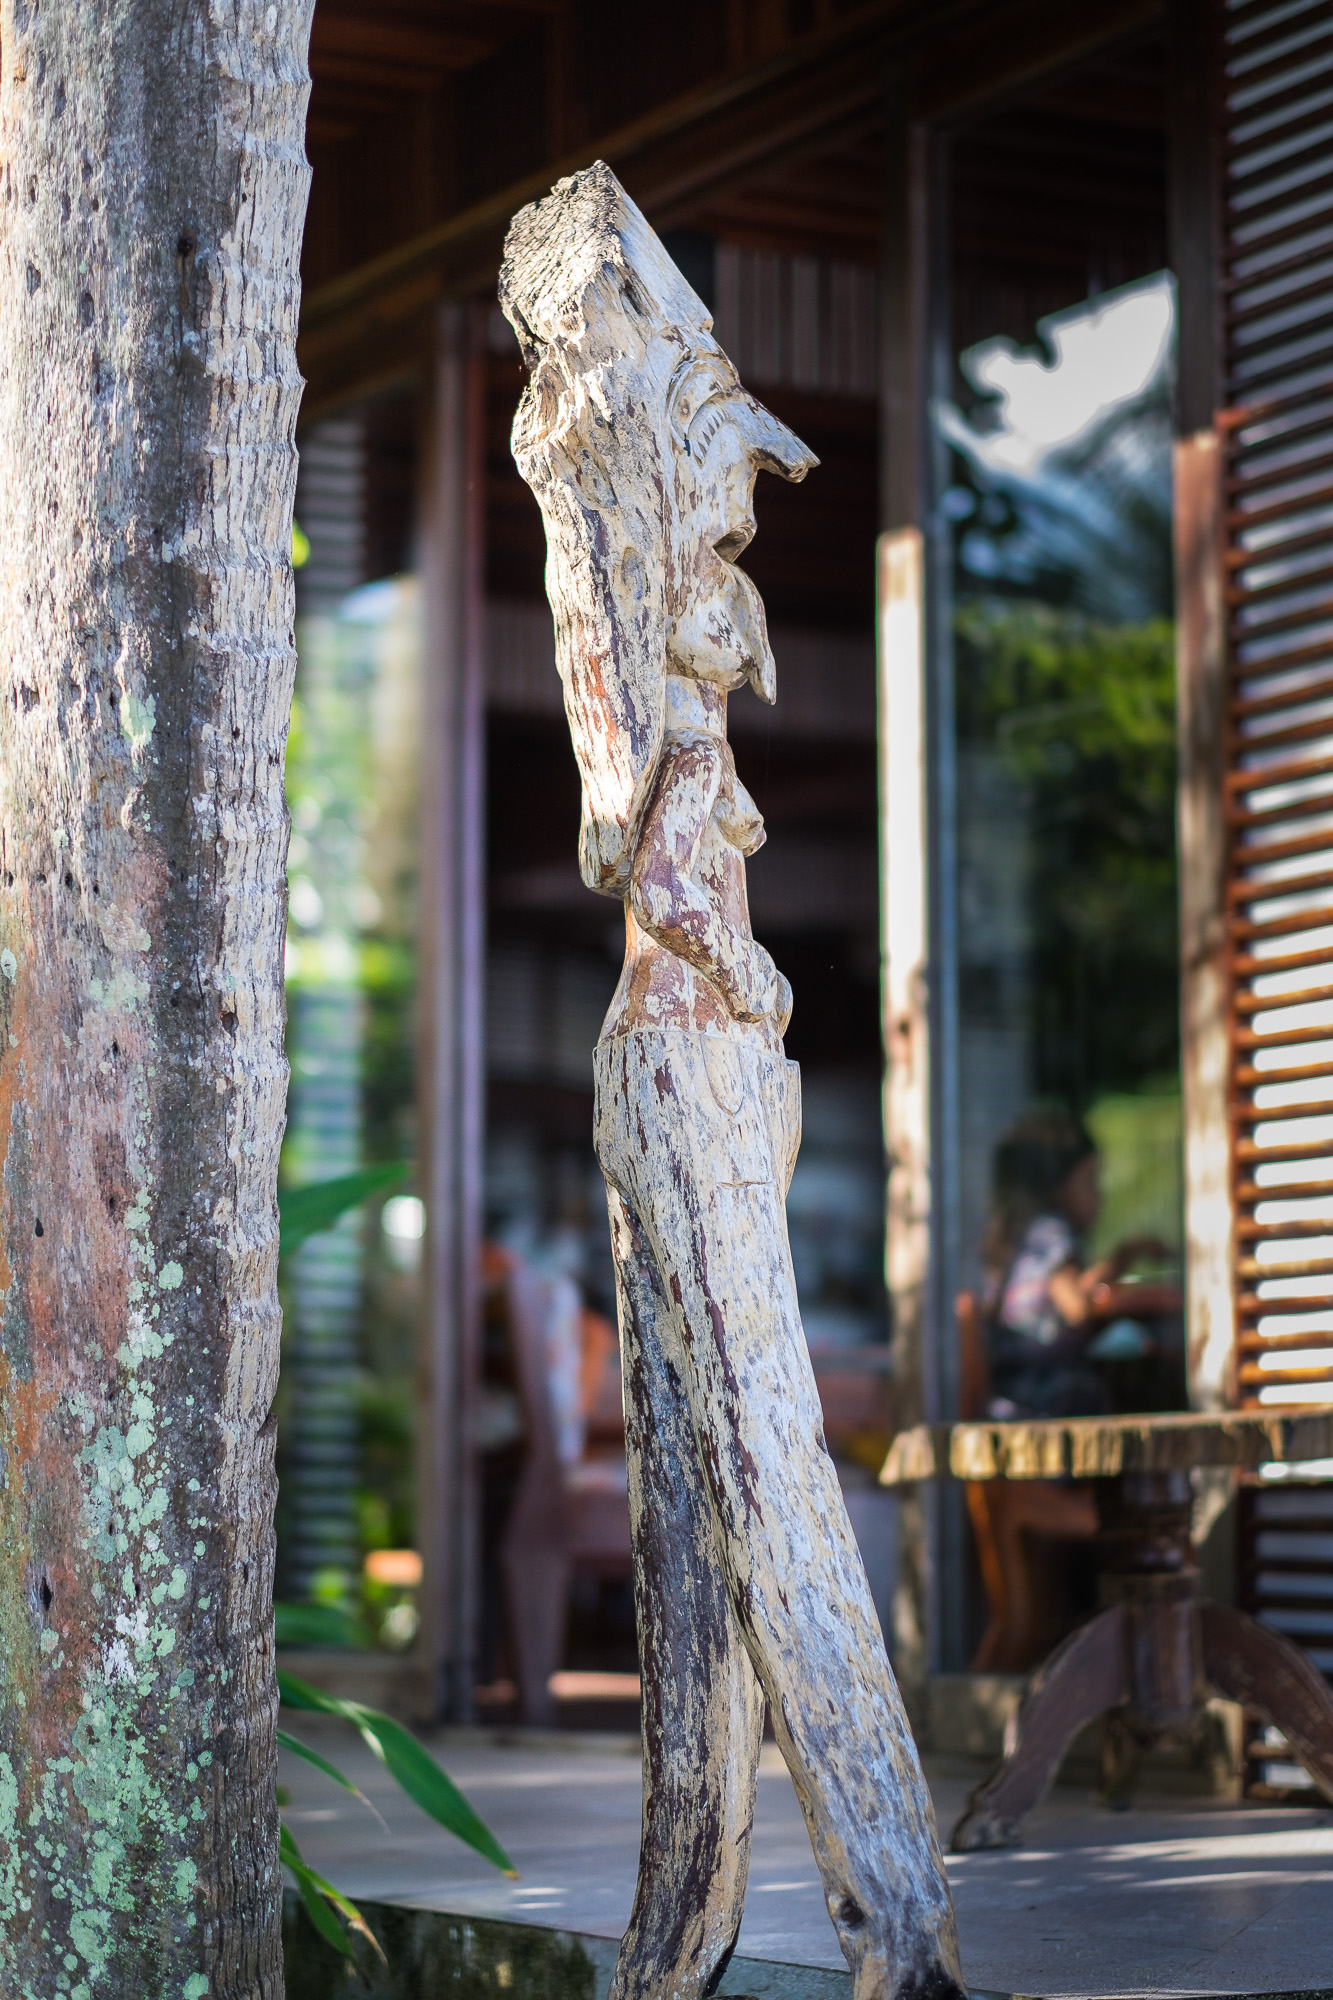
Philippines Carving at Restaurant: Case Study #4
While dining at the same restaurant with the deck from the previous photo, I saw a statue that the locals had carved and wanted to capture that. I used a palm tree on the left and a the shutters on the right as my frame. I liked the framing this time, but the area of the shutters is too bright and I feel it takes away from the statue.
I need to do two distinct edits in Lightroom to correct this image. The first is to reduce the bright area. To do this:
- Click the graduated filter tool in the tools panel on the right
- Drag the filter from the right edge of the photo toward the center
- Next, double click the Effect tool to remove the last effect used (on another photo)
- To lower the brightness in the filter area, reduce highlights and exposure
Next, I decided I wanted to enhance the statue even more. To do this:
- Choose the radial filter from the tools on the right
- Double click the Effect tool to remove the last effect applied
- Drag an oval area around the statue to select it
- Check the mask to be sure the correct area is getting adjustments by clicking Show Selected Mask Overlay below the photo
- Click invert mask if needed
- Increase the exposure and highlights just a little
A quick tip: To toggle between the before/after, click the \ (backslash) key
Manila Shaved Ice Trolley Vendor: Case Study #5
On this day, I was shooting with my Fujifilm Camera, 56mm f/1.2 lens. I watched the vendor come down the street with his trolley full of ice and sugary goodness. He stopped to chat with us and I thought that the stairs and the hut made for a great framing opportunity for his face. As you can see, I took several images, which were all great, but I really liked this one where he gave me a really good smile. I moved around, bent my knees so I could, again, frame him with the staircase in the background.
To make the image more powerful, I cropped in from the right, and the bottom. After looking at it, I felt the structure on the left was too yellow, so decided to crop in from the left as well. I increased the shadows and exposure a bit, and decreased the highlights,


FREE LANDSCAPE PHOTOGRAPHY COURSE
Summary
As you can see, framing is an excellent composition rule for really taking your photos to the next level. Be on the lookout when you’re shooting for elements such as trees, buildings, pillars, etc. that you can use to direct the viewer’s attention to your subject. It is also a very forgiving composition rule for post-processing. You can include much in your original photo and remove it later if you want. Play with it. Have fun!
Related Articles
Did you enjoy this article? You may be interested in these related articles too:
- Make an Impact Using the Rule of Thirds
- Making a Point…of Interest
- Choosing a Captivating Point of Interest
One simple rule of composition to take your photos from blah to great!
How to make that boring (but beautiful) landscape scene into something to talk about.
Composition is everything when it comes to landscape photography.
So what do you think? It’s pretty cool to see how powerful you can make your images with just a few simple adjustments in Lightroom, isn’t it?
Let me know in the comments below if you like seeing these composition quick tips!
Dear Brent
Love the quick tips from Lightroom – a reminder in an instant. Also, love the rebranding more compelling to me.
Continued success, Ted
Thanks Ted. Yes I’m excited about the new direction. B