Learn the best composition practices with long exposure.
What is long exposure photography?
Long exposure photography is created by using a long shutter speed to capture stationary elements of the scene while blurring or showing motion in the elements that move. It can be anywhere from a 1/2 second exposure to 10 minutes or more.

Why is long exposure a great way to photograph scenes?
Using long exposure techniques will open up a whole new world for your photography. It allows us to create images that humans can’t see with the naked eye. This method can create a magical and artistic feeling to photographs. You will be able to stretch your creativity as you explore long exposure photography. As will many photographic techniques though, it is still important to get your composition correct.
How to photograph using long exposures?
Start off by photographing in low light situations. Anytime between sunset and sunrise when there is very little light is a good place to begin. Choose a scene that has movement in it. Think about how the clouds move, waterfalls and water flowing or vehicles with their lights on heading down the highway. Each of these show movement that can be captured with long exposure photography.
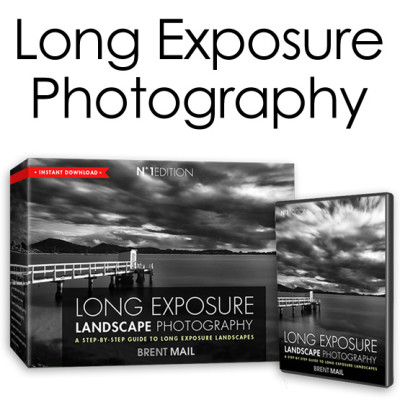 I created a simple step-by-step course for you on how to create long exposure photography.
Start taking incredible long exposure images this weekend.
4 photography lessons to teach you how to get started with long exposure photography
What type of equipment or gear is needed?
Neutral density filters are one of the main pieces of equipment you’ll need to get started. A neutral density (ND) filter covers your lens and darkens the light coming in. These come in lightness/darkness of 3-stop to 10-stop. A 3-stop filter lets in 3-stops less light and a 10-stop lets in 10-stops less light. You can purchase an ND filter to fit your largest lens size (i.e. 77mm) and get yourself a step-down ring that allows you to fit the ND filter to smaller sized lenses as well. There are also Variable ND filters which work like Circular Polarizer filters in that they rotate to create a light to dark option to use. You can also place filters on top of each other or stack them to get to the required amount of darkness you need.
You will also need a sturdy tripod to stabilize your camera. Any camera movement will cause your image to be blurred. If you don’t have a tripod use the ground, a rock or figure out another way to keep your camera still. Lastly, you’ll want a remote shutter, or a phone app to control your shutter without touching your camera. Again, we don’t’ want to have any sort of motion added to the setup.

How to set up for a long exposure photograph?
First, choose a scene that has movement. Next, compose that scene. It’s very important to get the best composition before you add your filters and get your settings dialed in. Choose leading lines or other options, decide what to include or exclude from the frame, how far to zoom in or out. Move around to make sure you have the best composition for the subject and location you are photographing.
Focus your subject. This can be difficult with the ND filters on and your camera likely won’t auto focus so switch to manual. Focus first, then put your filters on or use your camera’s live view with a high ISO to check your focus. Just be sure to change your ISO back to 100 when done focusing. Shoot in RAW so you have more editing options available. Take a test shot at f8, 1-second shutter speed and ISO 100. This is your starting point. Check your histogram to see if you’re too dark or too light. From there make adjustments to your shutter speed and/or your exposure.
If your image is too dark, use a longer shutter speed. Increase it to anywhere from 5 seconds to 30 seconds so more light is being let in. If your image is too light, close your aperture up to f16 – f22 so less light is being let in. Then experiment with longer shutter speeds. Look for movement in the image you capture. Remember to adjust aperture accordingly. Increasing shutter speed by 1-stop equals closing the aperture by 1-stop.
Use bulb mode if you want to photographer longer than your camera allows. Some cameras only allow for 30-second exposures. Bulb mode allows you to hold your shutter open as long as you need.
Photo BootCamp Magazine
Let’s take a look at what our BootCamp members have created for this month’s long exposure challenge.
And be sure to check out how you can join BootCamp at the end of the magazine!
Below is a small sample of what’s in this magazine…

Join The Fastest, ‘Funnest’ Way To Improve Your Photography!
- Discover exciting new skills
- Rekindle your passion for taking photos
- Improve fast with helpful feedback
- Experience enjoyment and progress
Inside BootCamp Magazine
Featured Artist
Let’s take a look at this month’s magazine. Here is our featured artist of the month, Lynton Stacey, from Australia.
The Adelaide Railway Station image was taken during the blue hour. To get a different perspective, Lynton was low to the ground, hence the tail lights a little higher in the image. He also cropped the road and some of the sky but left the name of the station visible. He took this while out for dinner with his wife for their wedding anniversary – she’s very forgiving!
Comment: Kerrie Clarke – “Wow, Lynton! I so, so love the detail you’ve captured in the architecture, and the light emanating from the windows on the long wall of the station is awesome… as are the starbursts and light trails! Love this image, it’s beautifully shot and processed. Really well done.”

Cover Image
This month’s featured magazine cover image is by Janet Rhead from Australia. This is an image of The Wheel of Brisbane. It was taken from Victoria Bridge looking across the Brisbane River towards Southbank and the Convention Centre. She was experimenting with different shutter speeds and effects and thus took many images of the Wheel in operation along with car light trails.

Comment: Rachel Gilmour – “Great image, Janet! have to agree that a crop on the left would be good and compensate on the right to maintain you composition. Nice sharp image and the reflections are an added bonus. Well done!”
Active Members
Let’s take a look at some of the long exposure images our BootCamp members’ created this month.
We’ll start with Lou Mason-Walsh from the United Kingdom. This is a 4-second exposure to flatten the water, it was taken about 5 minutes after sunset in Norfolk UK.
Comment: Lynton Stacey – “Lou, we forgive you for the length of time when you come out with an amazing image like this. I love the colour in the clouds which is reflected in the still water. My eye is drawn to the cottage first and then the windmill. Perhaps I might have cropped out the boat on the left because it takes my eye from the cottage, and maybe lightened the roof of the cottage to make it stand out from the trees behind. Very well done!”

Next, we have Dave Koh from Singapore. This image of the lighthouse was shot during the blue hour after failing to get a sunset shot which was not that spectacular on that day. His cable control wasn’t working so he was not able to do a longer exposure. Instead, he used a maximum of 30 seconds that his camera allows.

Comment: Laura Griffiths – “Dave Wow this is simply gorgeous. The blue hour, the leading lines, the lighthouse beautifully lit and the smoother than glass water. I think it’s magical. I can’t find anything negative to say”
Erez Shilat from Israel is next. This image was taken a few years ago, but it nicely fits this month’s challenge. He used a flash to freeze the performer’s motion while the long exposure blurred the light.
Comment: Kerrie Clarke – “I love the way my eye is drawn from the darkness into the light. Love it, Erez…wouldn’t change anything in this image.”

Then we have Eugene Brannan from the United States. This long exposure photograph was taken just after sunset on Mobile Bay, with the USS Alabama battleship and the Mobile, AL skyline in the background. Clouds would have been a nice addition to the photograph, but it happened that the sky was cloudless. Because of the cloudless sky, the photo was cropped to a panoramic format. A tripod was a must, as the wind was blowing which made the water was choppy. The extended exposure smoothed out the water. A small aperture contributed to starbursts on the floodlights near the battleship.

Comment: Sig Rannem – “Eugene, this is a beautiful sunset/blue hour image and you were wise cropping out the cloudless sky. I love the starbursts – great shot!”
Summary
- Long exposure photographs are images created using a long shutter speed to blur or show motion in the moving elements.
- Long exposures can be anywhere from 1/2 of a second to 10 minutes or more.
- Creating images using long exposure can stretch your creativity.
- It’s still important to get your composition correct.
- Low light situations work best.
- Neutral Density filters and tripods are essential equipment needed to create long exposure images.
Related Articles
Did you enjoy this article? Check out these related articles, too:
- Choosing Your Top Shots And Best Images From The Past Year
How to pick your very best photo’s – my 3 step system. - Creating Triptychs With Your Photographs
Learn how to create triptychs with images - Creating Cheerful, Artistic Photos With High Key Photography
What does HIGH KEY mean in photography?.
Do This Now
Please leave me a comment below – I’d love to know what you think. Brent
Congratulations to this months featured artist – Lynton Stacey, and this wonderful cover image by Janet Rhead. Well done – I’m super proud. Brent