Getting Creative: How to Isolate Your Subject in a Crowd using a Simple Trick
In this lesson you’ll learn a simple trick (to do with shutter speed) that I used to isolate my son in a crowd of people, and the great thing is – it’s something you can easily do too.
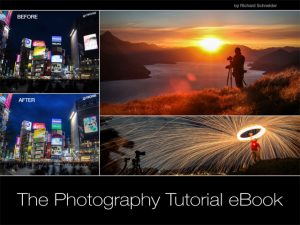 I was reminded of this trick in a photography book I’m reading right now, it’s called The Photography Tutorial eBook by my friend – Richard Schneider, and I think it’s very good.
In fact I think it’s one of the best photography books I’ve ever read, and I’ve ready a heap in the last 20 years or so.
Why’s it so good? Because I know it will improve your photography, by giving you a photography challenge or idea – that you can go out and try, right now.
Below is just one example I took out of this book – of what you can do in a crowd using one simple trick.
Watch this video to find out how to isolate your subject in a crowd of people…
What you’ll learn in this video:
(00:15) – Creative use if shutter speed
(00:40) – How to setup the scene
(00:58) – My special trick – ND filter
(01:08) – No filter – no problem
(01:27) – Trying different shutter speeds, which works the best?
(02:00) – 4 seconds shutter speed – WOW!
(02:24) – 6 seconds shutter speed – OMG
(03:19) – Summing it all up
(03:40) – Other places you can use this trick too
(04:08) – Review all the images from this shoot
Still subjects during long exposures
What I love about Richard’s book The Photography Tutorial eBook is that he gives you heaps of ideas of things you can shoot in a city or while travelling. I ended up on this page – where he explains how to shoot still subjects during long exposures.
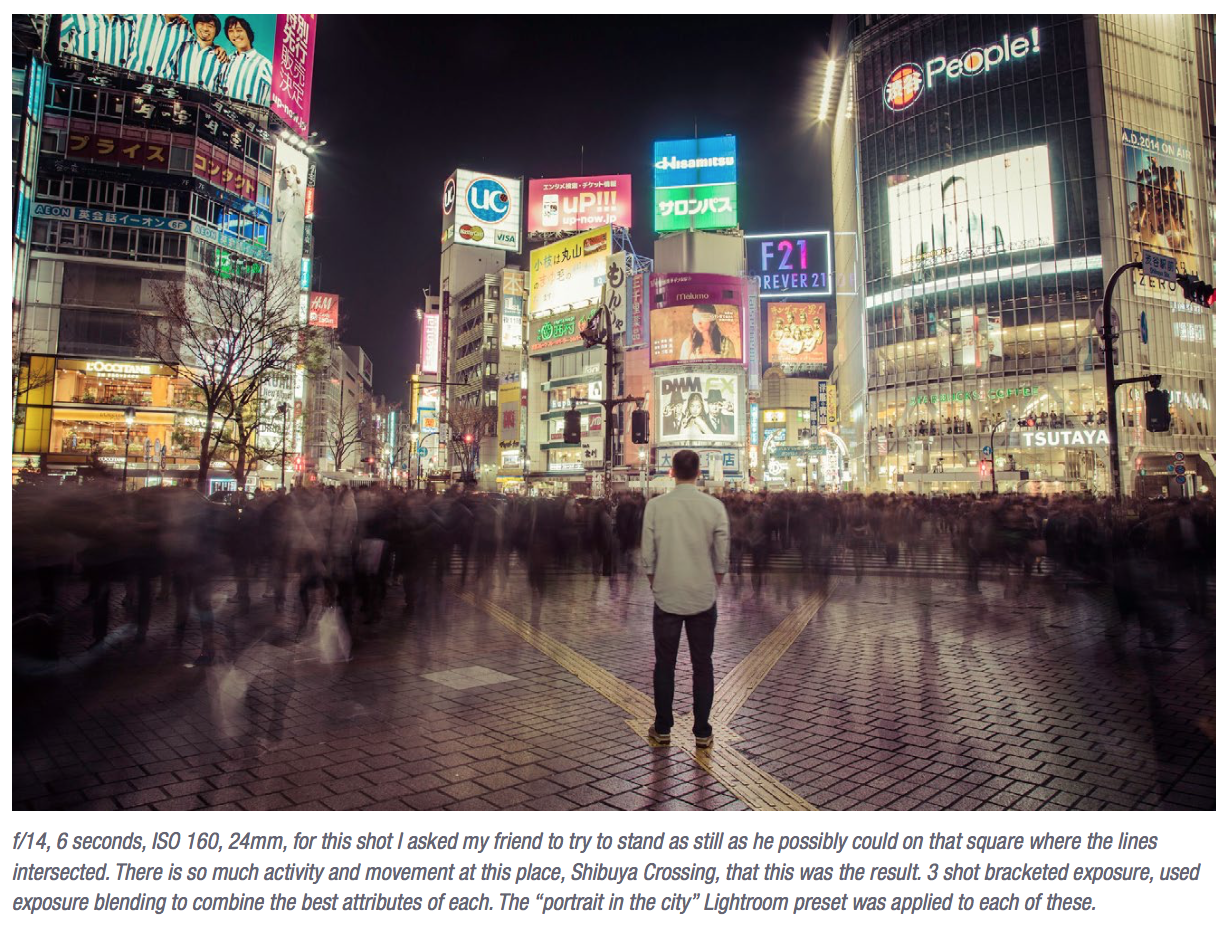
This is what he says: “At the end of my chapter on shooting motion from pedestrians, I mentioned a common type of very poetic shot: a single person standing still among a crowd. Homeless people, human statues or individuals sitting on park benches make ideal subjects for this type of shot; they seem ignored by a world that’s passing them by.
Well, now we’re going to talk about how to do just that—as well as riff off that idea to brainstorm other types of shots that involve still subjects in front of moving backgrounds.
The background, of course, doesn’t have to be made of moving people. There’s no shortage of movement in cityscapes, or even landscapes: you can shoot a subject standing in front of a moving waterfall, zipping traffic or any kind of special event, like a parade. Creativity is key here: the more of these shots you take, the more perceptive your eye will become for what could work as a potential long-exposure shot.
Contrast and Texture
The reason these shots work so well, to harken back even further, is because they look interesting. Let’s recall the early chapters of this book, wherein we established what makes an interesting shot — remember contrast and texture? They’re the two key elements we see in this type of photography. We’re contrasting stillness with motion, and using that motion to blur out a wonderful background texture against the sharpness of a foreground subject.
Add some interesting composition and maybe a few leading lines, and you’ve got all the basic tenets of photographic law. This isn’t groundbreaking stuff—it’s Photography 101, just with a twist.”
Still Starting, Starting Still
He goes on to say: “This photographic trick is extremely easy to prepare for. Beyond the scenario itself (a willing model, a moving background), all you need is a tripod to get started. At night this comes particularly easily, because long shutter speeds come naturally; however, as we discussed in the previous chapter, you can also set it up during the daytime with an ND filter blocking out the light.
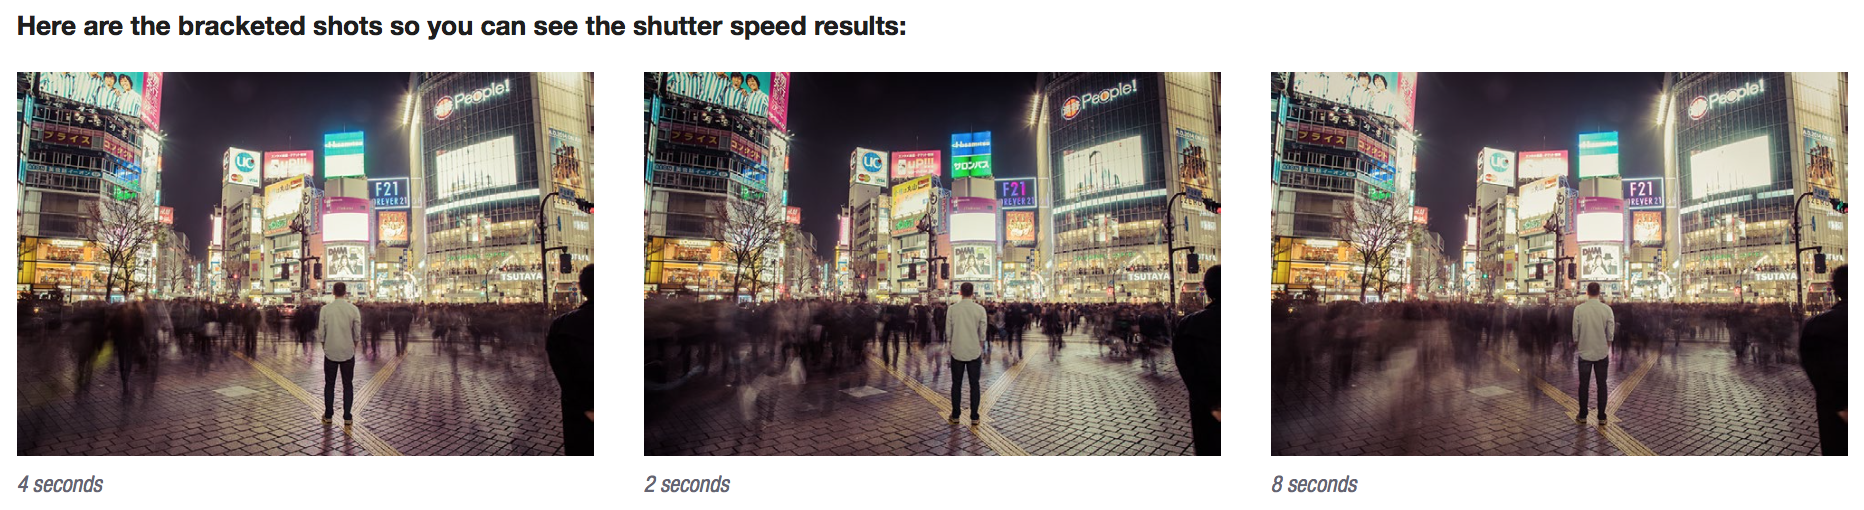
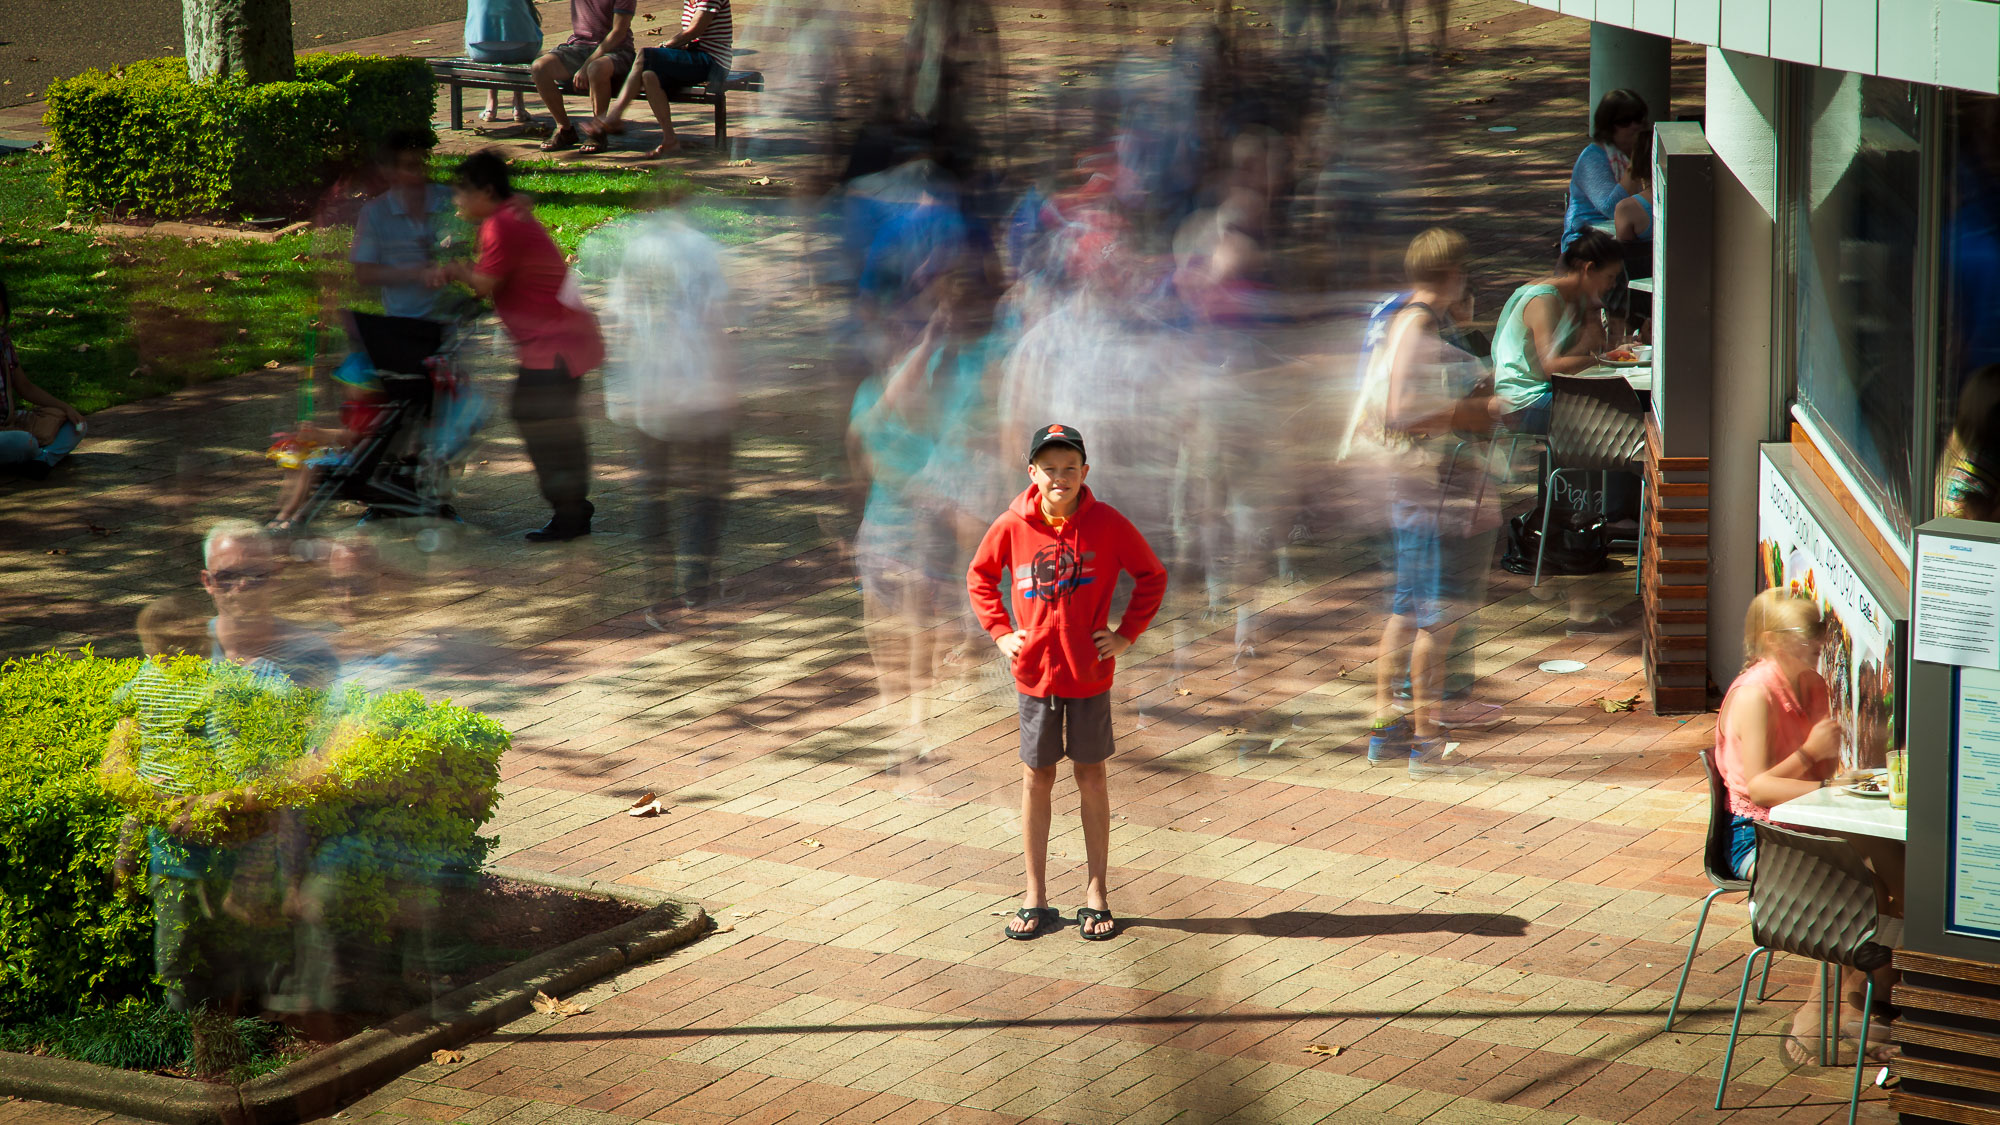
You can set your exposure/shutter speed to pretty much anything longer than 1 second and the technique will work. As you can see in the example photo here, shutter speeds between 1-5 seconds produce blurred individuals with that are still somewhat defined. Shutter speeds between 5-10 seconds produce less defined streams of blurred masses. Both can work well, it just depends how you want your final result to look. Some of my best images including the example provided in this chapter have come from combining multiple bracketed exposures implementing a range of shutter speeds. As with HDR and numerous other techniques mentioned in this book, exposure bracketing is extremely useful for balancing out variances in bright lights and darkness – and in this case amounts of blur.
And if you’re shooting yourself—especially in a cityscape selfie scenario—feel free to ignore everyone stopping and looking at you strangely. Confidence is a great deterrent against onlookers, and they’re likely to shrug and move on. Besides, the longer your set shutter speed, the less likely any gawkers will visibly show up in your shot. (And besides, even if they do, it might look kind of cool.)”
Using a ND filter to get these magic effects
In my video lesson above, I use a 10 stop ND filter to get the same effect that Richard got in his city example where he uses multiple exposure and then blends them.
Watch the video above to see exactly how I created this image of my son, especially the end where I run through all the images from the shoot.
Here is the final image I liked – see how cool it looks? (Click it see it LARGE)
Summary
This is what I love about photography – the chance to get really creative. By using this “trick” of shooting multiple long exposures, or by using a 10 stop ND filter you can create surreal, amazing looking images today.
- Find a crowded area
- Find a willing subject (your kids, perhaps?)
- Use a 10 stop ND filter on your lens (or shoot after sunset)
- Get your subject to stand/sit still, while the crowd moves around them
- Use a long shutter speed to capture movement (1-6 seconds works great)
- Shoot in RAW so that you have control when post processing your creations
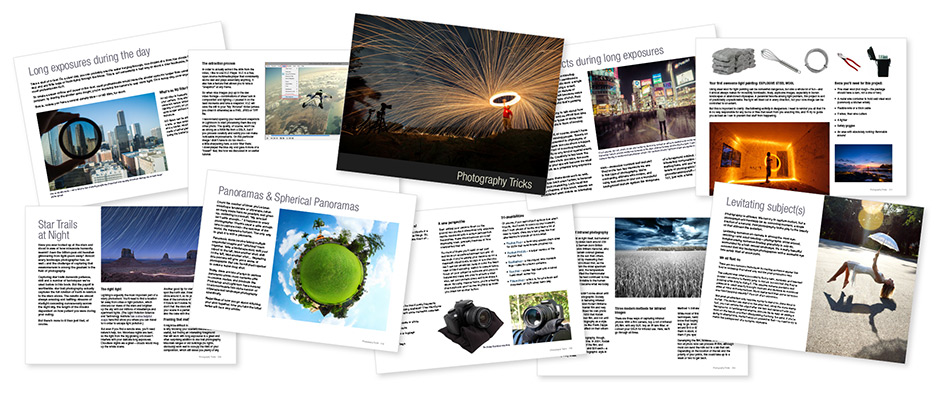
Have a look at Richard’s photography book (click image below) for even more examples of trick photography like levitating subjects, panorama’s, light painting, swapping out the sky, star trails, upside down perspective, shaped bokeh and more.