Kookaburra workflow; From failed throwaway to rescued recovery!
Following on from my recent walk in the bush capturing a kookaburra perched in a tree, let’s now look at my chosen image and how I decided to edit it.
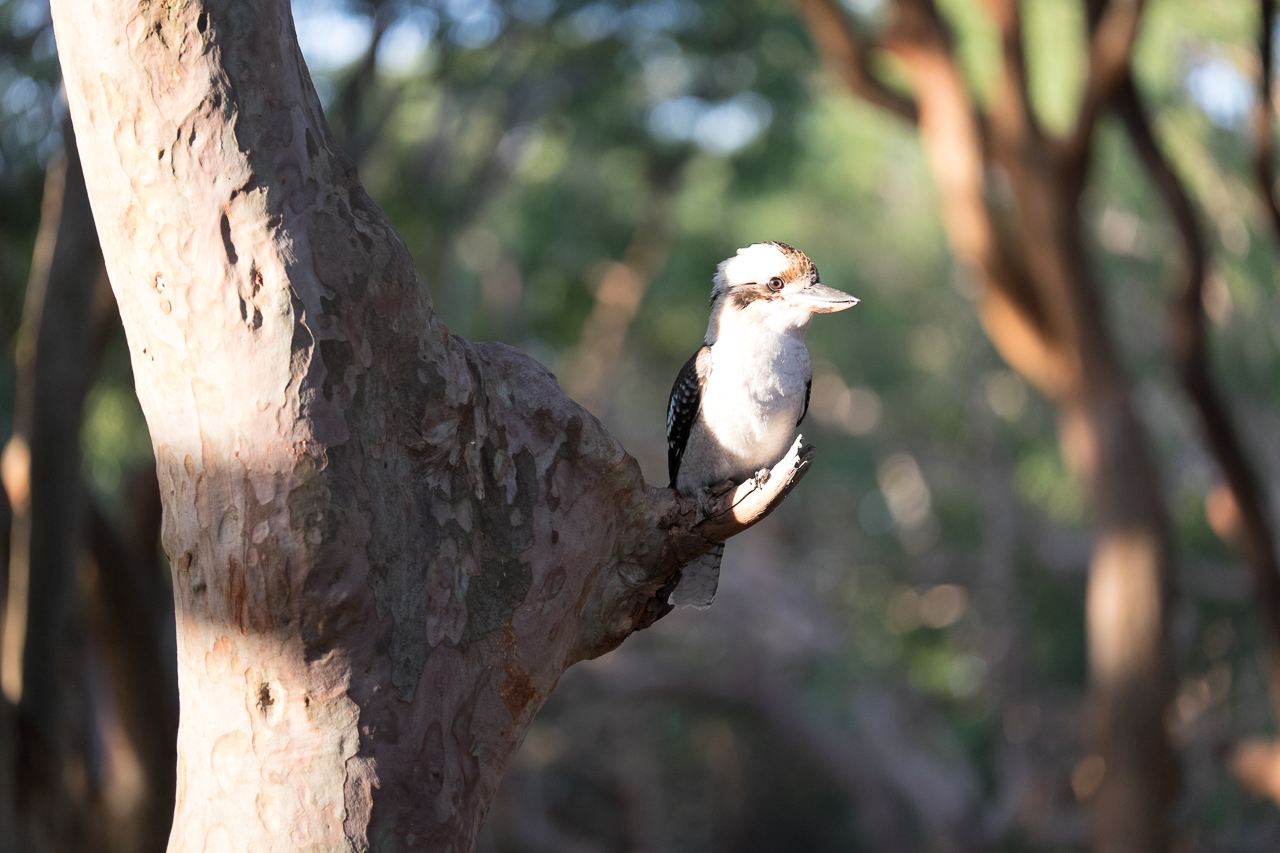
My first thought upon opening this file in Lightroom, was the attention drawn to the incredibly blown out highlights of the bird’s feathers. The clipping is made quite obvious by the huge spike shown on the histogram. So I knew I had to fix this problem first of all.
Watch this video to find out how:
0:13 Raw image of the Kookabura
0:44 Lightroom editing tips
10:24 The final image, problem fixed!
How I fixed the blown-out-highlights problem
White balance – Camera got it wrong!
I went to the ‘As Shot’ tab, then hit ‘Daylight’. Knowing it was natural light when I took the shot, I figured that without being able to grey card the image beforehand due to time, the white balance should be about right in this shot.
Clipping the highlights
From there, I brought the entire exposure of the image down to compensate for the blown highlights. Then held down ‘Shift’ and double clicked on the whites, then again with the blacks.
Whereas the blacks went up to +9, the whites didn’t do so much. So I manually brought this down myself a bit later, to pull in the clipping on both the head and the chest of the bird. I then looked at the image so far and decided to boost the clarity and vibrance to give the picture a little more punch.
Camera and settings used:
I shot this image on the Fujifilm X-T1 with wide-open aperture of the 50mm-140mm lens at 140mm F2.8. When testing new cameras, I generally like to stretch new lenses to their full range at their widest aperture and this day was no exception.
The shallow depth of field, as shown in this image, provides great dynamic for wildlife photography, that really allows you to zoom in on the subject and not have distractions of the surrounding trees. So I then went on to look at the detail of the frame.
Focus & sharpening
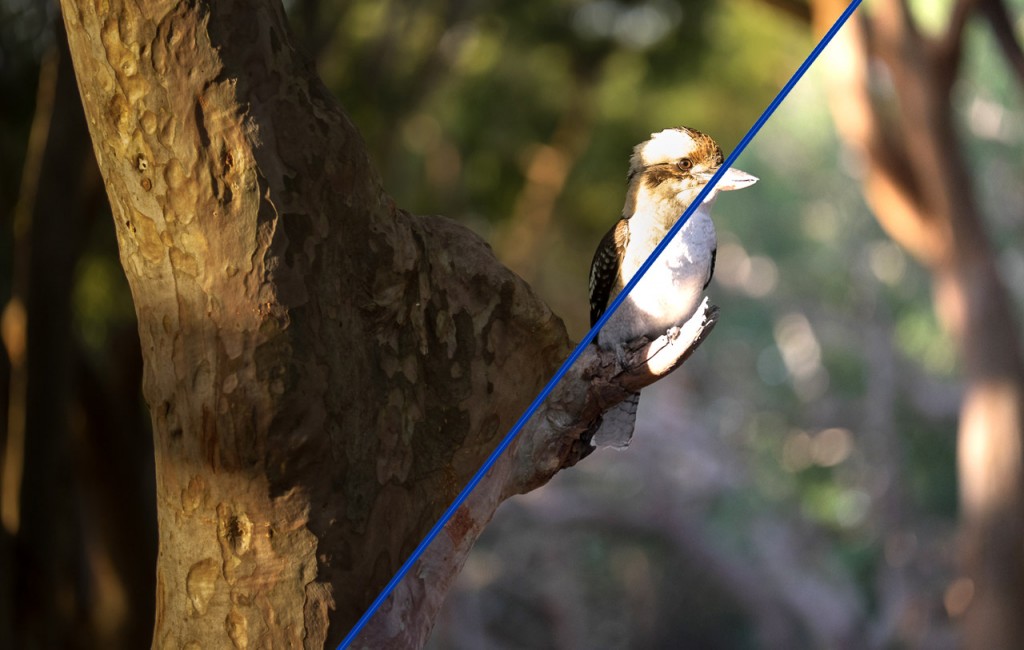
I always focus on the eye of the subject and then look to check detail around that. Lightroom is great for masking, which allows you to focus on one area specifically without affecting the whole image when it comes to things like exposure.
So I held down the ‘ALT’ key and dragged the masking bar right right, this sharpens the whites without sharpening the background (that is deliberately) blurred with it. I also noticed some noise in the background so I moved my luminance up a little – I was taught a great mathamatics trick by Johnny’s Lightroom courses, where it all must equal to 100.
In this case, that’s ‘Sharpening, Amount’ 86 plus ‘Noise Reduction, Luminance’ 17, totalling 100 (86+17=100).
Final touches
To finalise my image, I looked over the effects and this is where I used the vignette tool feathered off over the crop. I then cropped the image itself following the rule of thirds. It was important I could use the ‘Radial’ filter over the bird and not all of the image, to bring back any left over blown highlights by lowering the exposure a very small amount (any more wouldn’t make sense to the image). I did this again for the background to keep it soft and less distracting.
Finally, I used the graduated filter to the left of the image, to help mute some of the highlights on the tree that could deflect too much from the subject. My image was now complete and the attention left solely on the kookaburra.
Job done!
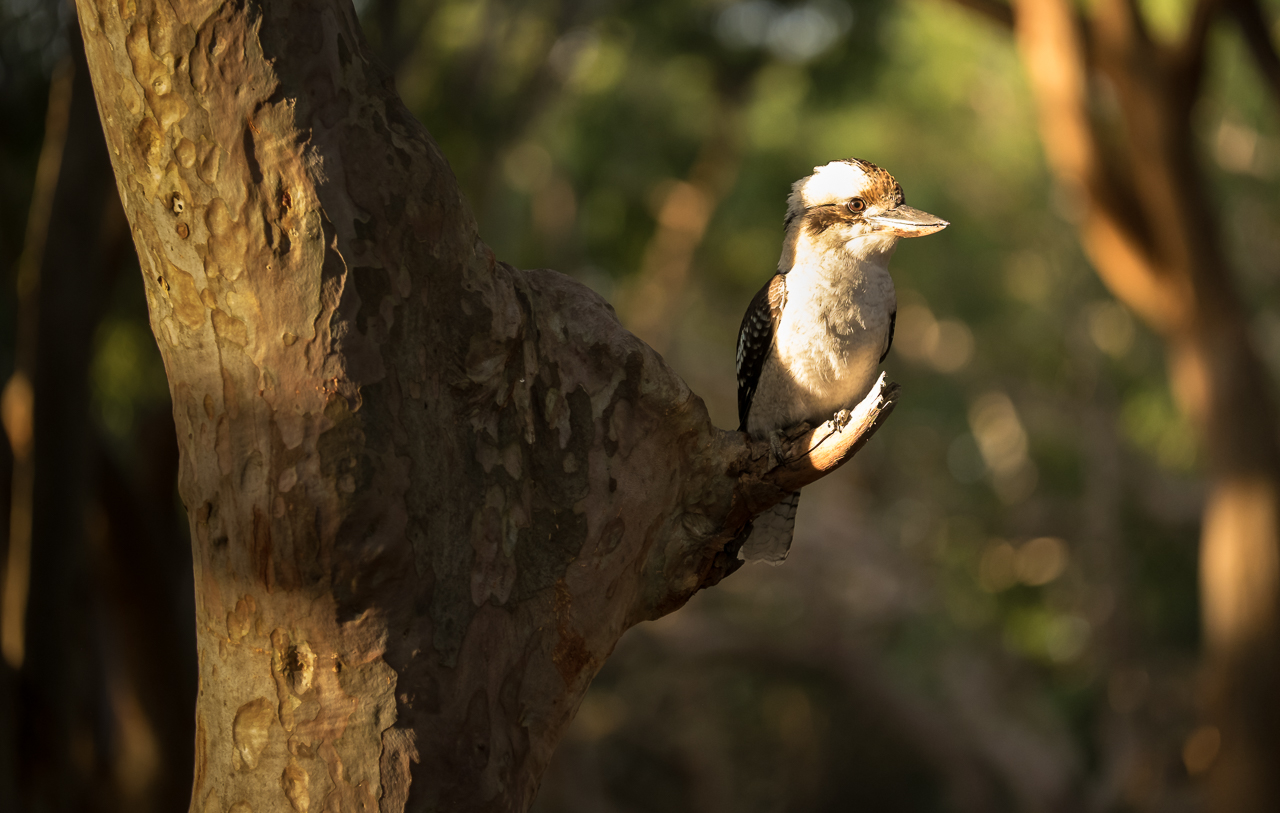
So from a throwaway image I thought would be lost, I now have a reasonably good portrait of a bird in the natural light, rescued by a quick edit in Lightroom.
Summary of my 10 quick and easy edit steps:
1. Checked histogram for blown highlights
2. As Shot – select ‘Daylight’ white balance
3. Brought exposure down (highlights clipping)
4. Held ‘Shift’ then double clicked on the whites then the blacks
5. Boost to clarity and vibrance
6. Held down ‘ALT’ and dragged the masking bar to sharpen only the bird
7. Reduced noise by increasing luminance (equation to equal 100)
8. Feathered vignette
9. Cropped using the rule of thirds
10. Radial filter and graduated filter to darken leftover highlights
Do you have any near misses like this? I would love to hear your stories and how you rescued them.
Leave a comment below and tell me about your recoveries!
Cheers,
Brent
FREE IMAGE EDITING COURSE
Learn to Edit an Image in Just 10 Days!