How to make your Landscape Photo’s POP! Use Filters
Hi Guys, In this post you’ll learn about photography filters and deciding which one to use when you’re photographing a landscape scene to make your images POP!
Make sure you checkout my new in-depth article The Ultimate Guide to Shutter Speed in Photography for more tips and lots of examples of how shutter speed is used in photography.
Highlights of this video:
0:33 – Photographing without filters
1:11 – Photographing with circular polarizing filter
2:01 – Photographing with 3 stop neutral density filter
2:39 – Photographing with 10 stop neutral density filter
How to create those magical landscape images
Really, it all boils down to the feeling or emotion that you are trying to convey with your photography.
I love the moody, long exposure images where the water looks like milk and the clouds streak across the sky. To create that kind of an image I need to shoot the scene with a few different filters.
Let have a look at how filters effect the same scene, shot at f/16 at the same focal length.
No Filters & Circular Polarizing Filter
These next two images show what a circular polarizing filter does. The first image has no filter attached, and looks a little dull and lifeless. The 2nd image has a cirular polarizing filter attached – it takes the glare out of the water and the sky.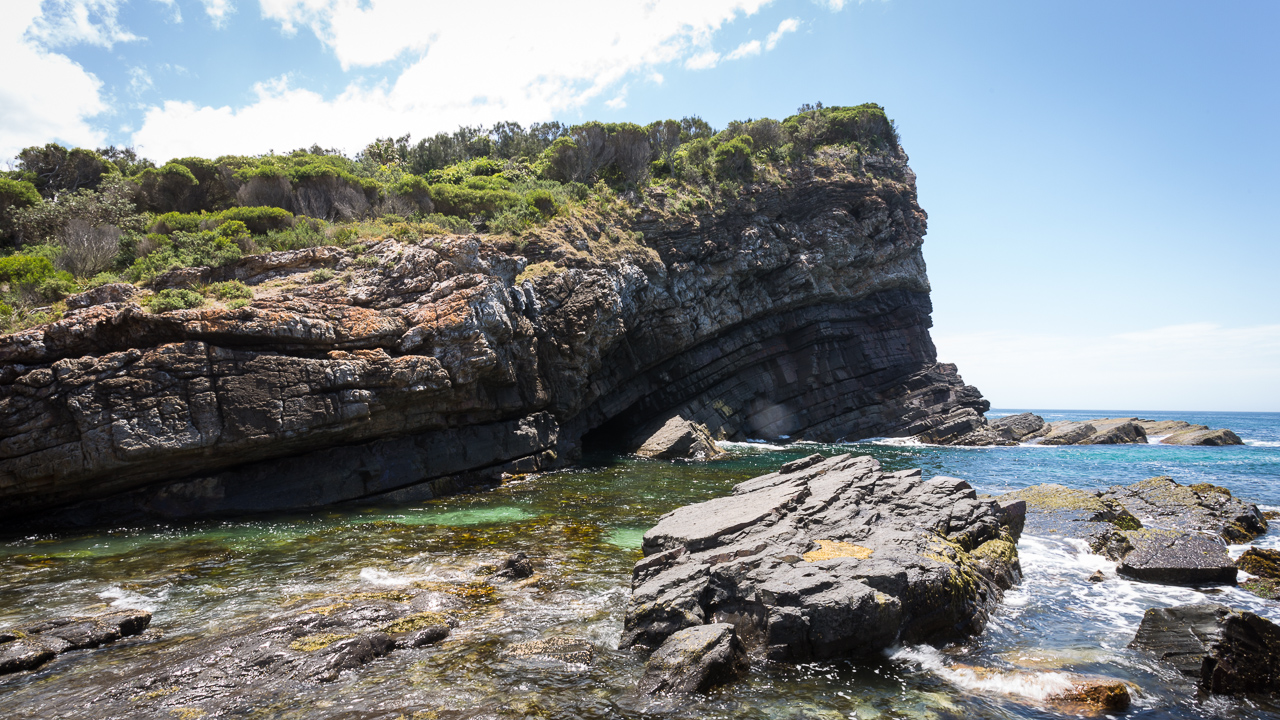
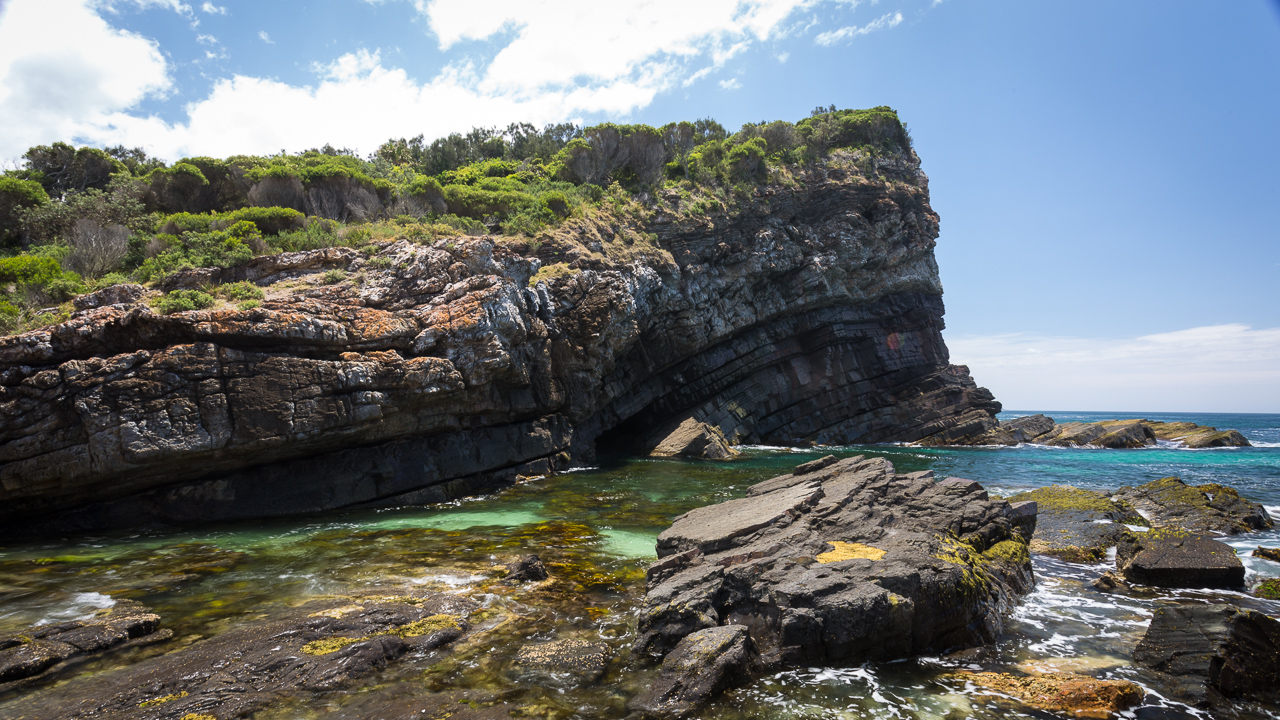
This filter makes the colours really pop out a lot more. Much better!
3 Stop Neutral Density Filter
Here I used 3 Stop Neutral Density Filter with one second shutter speed to capture the details of the activity in the water when the waves hit the rocks. Little swirls are visible – take a look.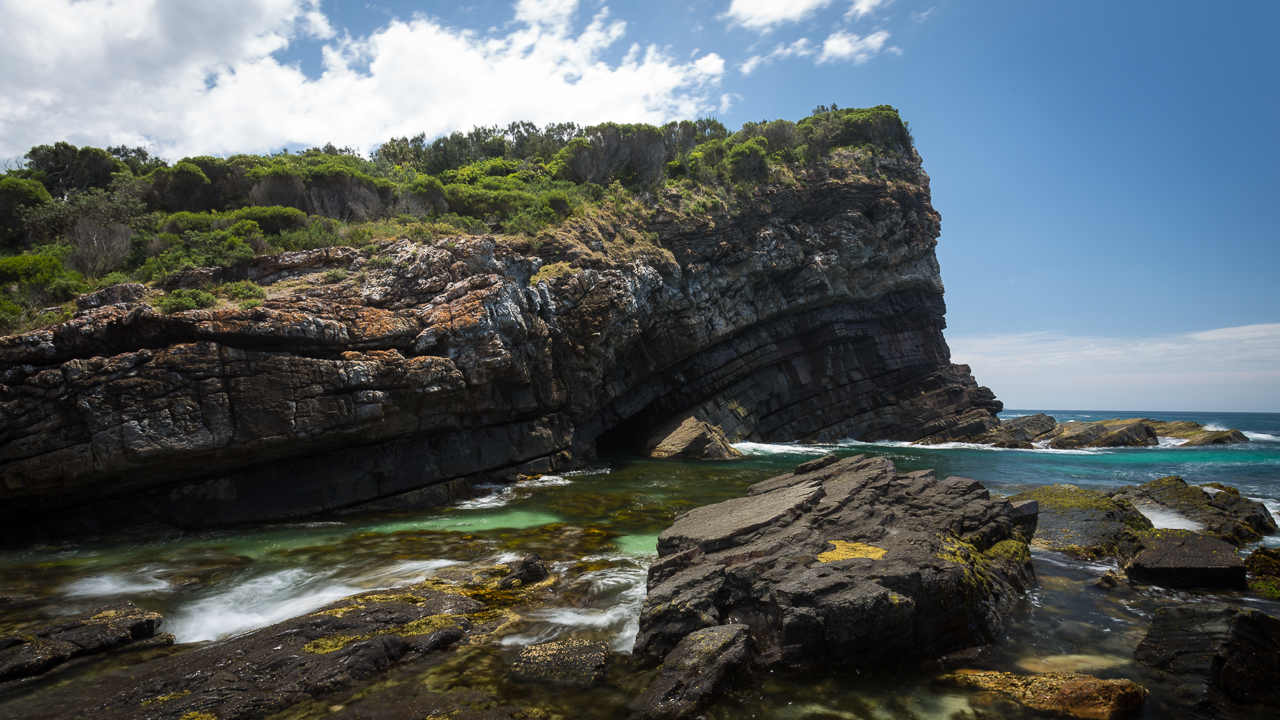
10 Stop Neutral Density Filter (WINNER!)
This is the image that I like the most. Here I used a 10 Stop Neutral Density Filter with a very long shutter-speed. This is the image that makes coming to a place like this, worth it for me.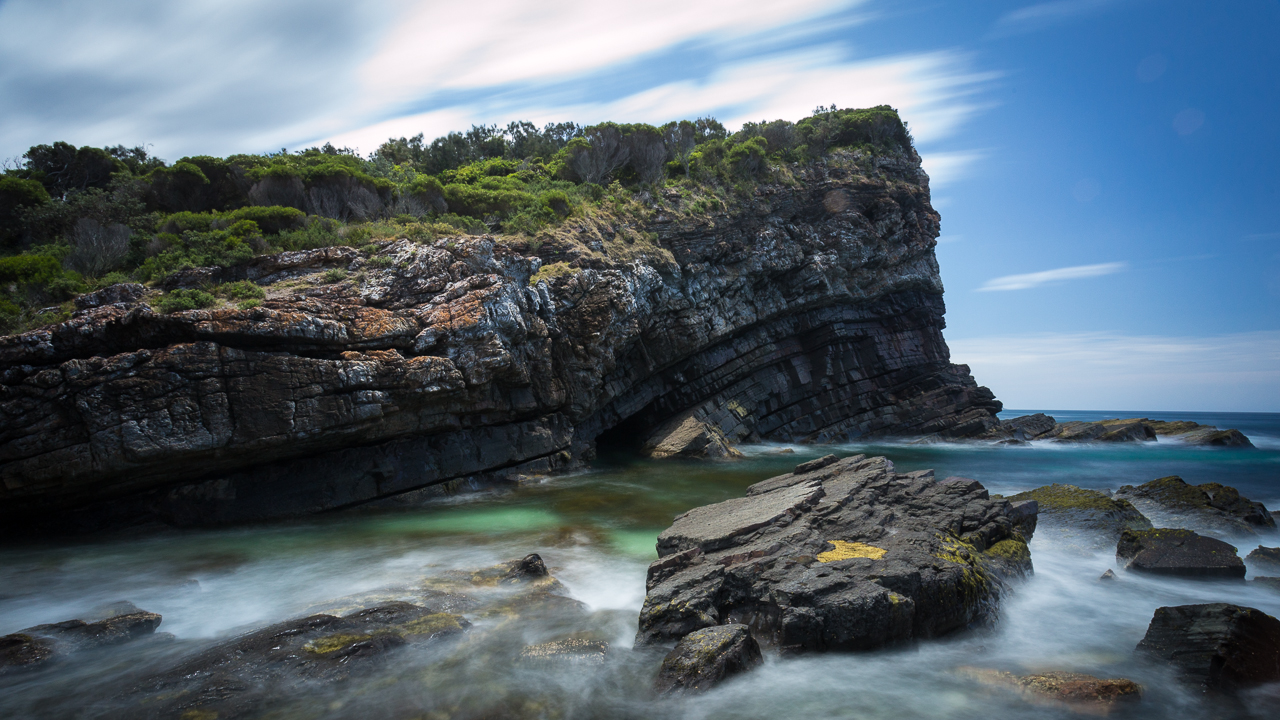
Love these long-exposure images!
What do you think? See how changing filters can create massive impact on your photograph?
Feel free to leave a comment below. I love hearing from you!
Cheers,Brent
FREE LANDSCAPE PHOTOGRAPHY COURSE
Learn to take Amazing Landscape Pictures in Just 14 Days!
I only have the circular Polarizing filter maybe santa will bring me some more goodies… but Birthday is first lol I guess I best start making a wish list
Yes, wishlist is great idea. B
Just awesome Brent! I’ll get there someday.
Cheers
Wow thats amazing, I was always asking my self what photographers doing to do 30 sec shutter speed on day light, and here is the answer.
You are awesome dude 🙂
Thanks for sharing
Ahmad
I would like to clarify one point. It appears that you left the polarizing filter on the camera when using the ND filters. Is that true and is it really necessary? Thanks for the information.
Yes – it is needed, otherwise you get the glare on the water and the sky is not that deep blue. Stacking filters is a great way to make you images POP! B
Thanks Brent, that was very informative. It was great to view the difference the different filters created.
Cheers Heather.
Thanks. B
The 10f filter gives a lot of motion blur, accented in this scene because it has motion in the foreground and in the background, with no motion in the center. I think it’s over done. Notice the first unfiltered picture has glare in the center where the sun is hitting the lens glass. Shading the lens from out of frame would help. I prefer your polorizer and 3f filter because it didn’t introduce unrealistic blur while cutting the water glare. It made the image pop without seeming fake and leaving the viewer analyzing the photo. I would have also tried the 3f ND filter slid half-way down from the top to try to enrich the sky while leaving the water bright and not blackening the cliff any more. Because you’re shooting from a distance, you can open the aperture a bit which would blend the edge of the ND filter. Align the filter edge with some horizontal edge in the picture, like the top of the cliff. I use ND gradients, or color gradients for this. This use of filters is reducing the dynamic range before it gets to the sensor to keep from blowing out or under exposing. Realizing the camera “sees” differently than your eyes takes some practice and experimentation.
Love your work and way of sharing your skills. Thank you !!
Thanks for those comments Mark. I also use graduated ND filters, just not on this shoot. Brent
Wow what amazing difference in the photographs after attaching the ten stop filter. Thanks for the tutorial Brent
Love my 10 stop!