How to take a hazy night time shot – and bring it back to life
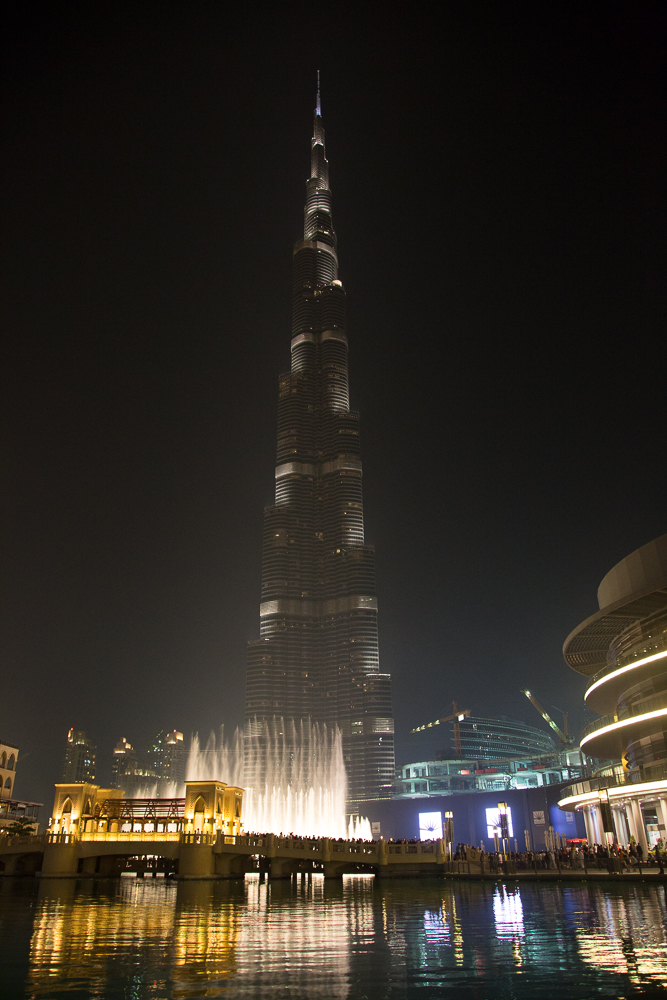
Whilst on a recent holiday with my family in Dubai, we came across the incredible Burj Khalifa; also known as the tallest building in the world! I whipped out my camera and took a handheld shot, having forgotten my tripod that day.
Watch the video here!
The shot was taken at 1/30 of a second, F4.5, and auto ISO 3200 on my 24mm lens. As we can see, there is a lot of noise in the sky from the dust in the air and the very high ISO, but I’d like to show you how I’ve gone from a busy, hazy colour image, to a much stronger black by using some of the new features in lightroom.
Here is the colour image – straight off the camera.
Editing in Lightroom
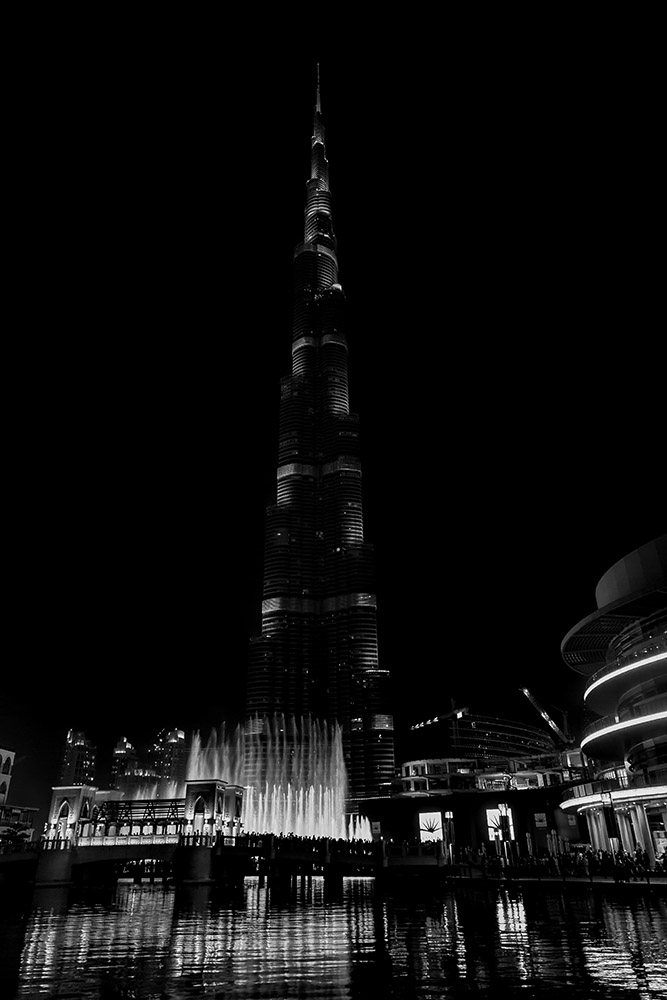
When I downloaded this photograph to my computer and opened it in Lightroom, the first thing I loved was the almost comic book like ambience to the shot. I immediately wanted to change the colour tone to monochrome, as I felt that the style lent itself well to black and white (probably because of the distracting illumination in the shot).
Adjusting the exposure
First of all I brought the exposure down using the histogram and used the slider to drag the highlights down that were clipping.
QUICKTIP:If you hold down Shift and double click on the whites and then the same on the blacks, Lightroom will adjust that correction automatically for you. As you can see, it makes a noticeable difference!
Keep the balance of the image
Once I had my image at suitable brightness, I was careful not to increase the clarity too much as I knew that will intensify the noise we already have in the sky.
How much sharpening?
A great tip for ensuring an equal balance between noise reduction and sharpening, is to make them equal a total of approximately 100 in your settings. For example here, by increasing the sharpening to 56, the noise reduction luminance needs to be about 50. This isn’t a set rule, but it works really well and is a great bit of advice to remember.
Another way of curbing the unavoidable noise in your images and NOT sharpening these areas is by using the ALT key for masking. Here I have sharpened only the areas that I want to stand out and not the noise in the sky, which has worked extremely well for the shot.
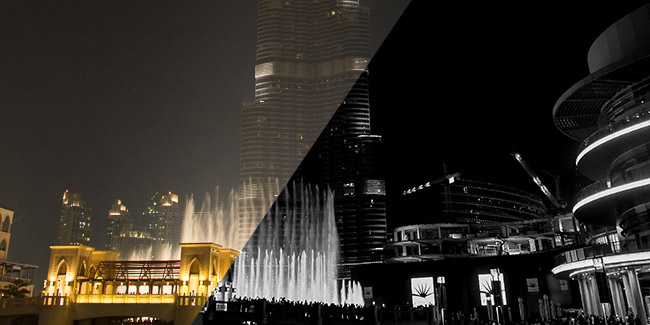
Final touch – Dehaze
Now we can look at lens correction. As we can see, by cranking up the dehaze filter and adding a little vignette, the image becomes much cleaner and certainly more aesthetically pleasing.
I love the dehaze filter in lightroom!
To sum it all up:
- Convert to monochrome
- Bring exposure down using histogram
- Unclip highlights
- Auto correct white point and black point
- Noise reduction
- Mask to sharpen
- Dehaze filter and vignette
So that’s my shot! What do you guys think? Do you have much experience using dehaze filters in lightroom? Has using it changed an image of yours dramatically? Leave me a comment below.
All I want to alter now, is the slight lean of the buildings due to being shot on a wide angle lens. Join me next time where we examine perspective and how to make it work for you.
Want to learn more about image editing and post processing?
Grab My FREE Post-Processing Course
Very helpful Brent, I have LR6 (not the CC) and I cannot find the dehaze filter in effects. Do you know if they have deleted it or hidden it?
I had to upgrade to get it. I think it appears in LR6.1 onwards. B
thanks Brent, I will check out if I have got the upgrade.