How to correct exposure and white balance in an image with both bright highlights and heavy shade
If you’re a regular to my blog, this image may look familiar. In this previous post, I showed you guys my process for choosing an artistically inspired shutter speed to capture the perfect amount of motion in the water spray. In this follow up video, I will show you how to make some basic edits in Lightroom to correct over-exposure and white balance.
Watch this video
In this episode:
(00:09) – Brief look at the before and after
(00:38) – Starting with the original image
(00:50) – Johny’s Lightroom Presets
(01:37) – Adjusting the Basics (white balance, exposure, contrast, clarity, etc.)
(01:37) – White balance
(02:14) – Tone (exposure, contrast, highlights, shadows)
(04:40) – Clarity, vibrance, saturation
(05:32) – Fine-tuning details and such (masking, noise reduction, vignetting)
(07:30) – Applying graduated filters
The challenge: Taking this image of the model kicking a spray of water into the sunlight from unbalanced, with an over-exposed sunlit area on one side and a chilly, shaded area on the other, to a vibrant, warm, refreshing photo.
My first step was to use one of Johny Spencer’s Lightroom Presets, Great Place to Start, from his Special Sauce collection. Johny is the founder of 3 Colors, a nature and landscape photography learning resource. You can download these presets for free by subscribing to Johny’s newsletter from his website at http://threecolors.co/.
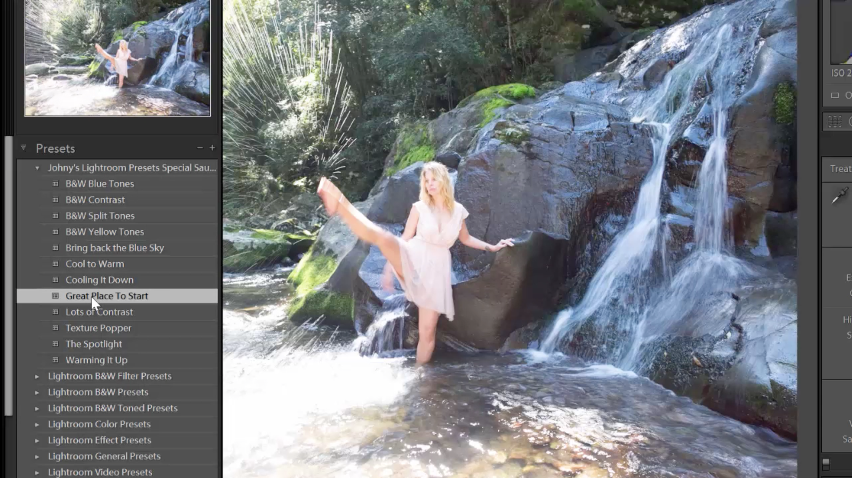
The “Great Place to Start” preset is, as the name implies, a great place to start! It allows this image begin to pop out and does a good job of bringing a little bit of balance into it. This particular preset increases the contrast, tones down the highlights, and brightens up some shadows. You could do each of these adjustments individually using the sliders in the Basic panel, but using a preset is a simple and quick way to jumpstart your post-processing with the click of one button.
Adjusting the Basics
The first thing I tackled was the white balance. I started by changing As Shot to Auto to see what effect that had on the image and there was some definite improvement. But the image still needed some additional adjustments because it is half in the shade and half in direct sunlight with some highlighted parts blown-out completely.
Next I decreased the exposure and highlights to address the over-exposed highlights in the water. I followed that up with adjustments to the white and black points, then increased vibrance, which generally only affects non skin tone colors.
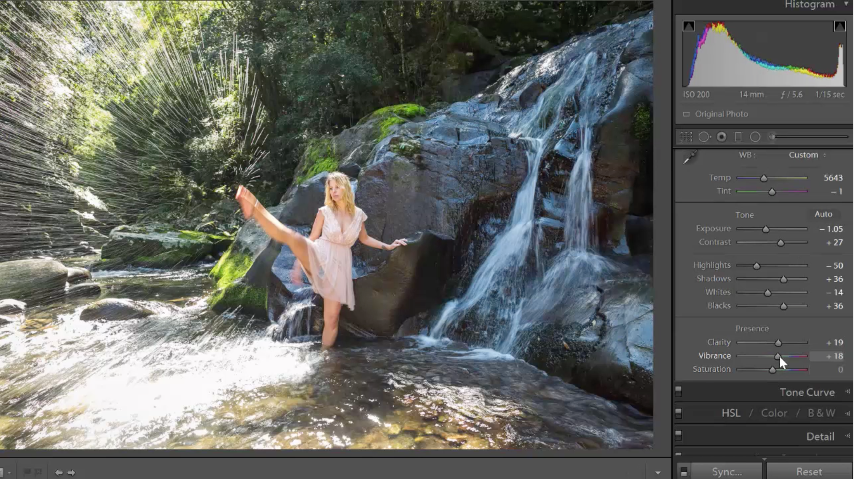
Remember, if you hold down the shift key and double-click on the whites and do the same for the blacks, Lightroom automatically corrects these settings. You may have to make a few small additional adjustments, but this shortcut should get the settings pretty close to the right place.
TIP: You can use the backslash (\) key to toggle between the before and after image.
Further Enhancement
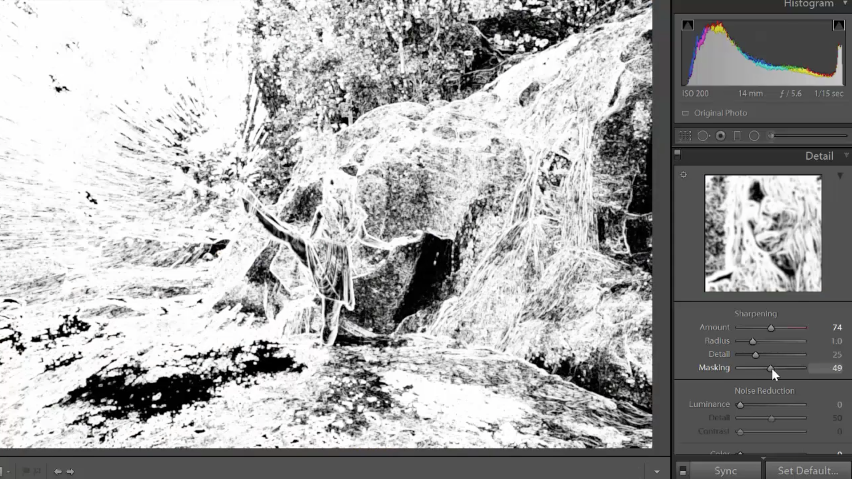
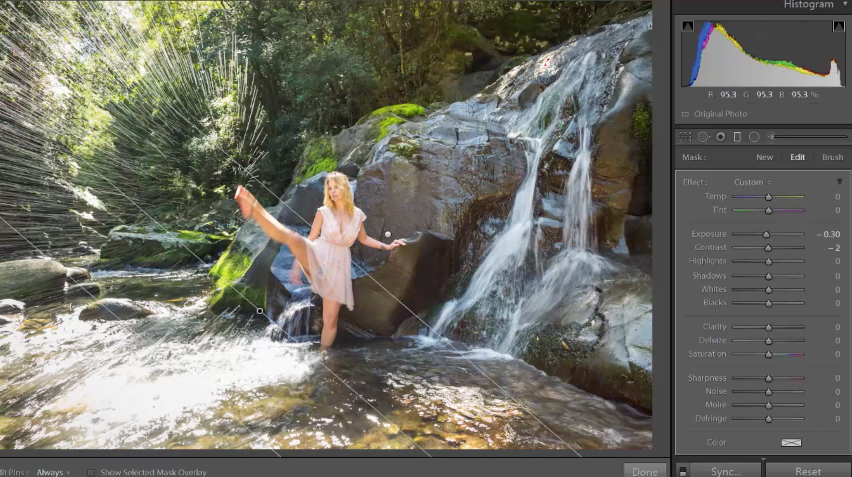
I often like to sharpen or reduce noise in my images a bit, which is done in the Detail panel. For this image, I used the Masking slider to make adjustments to the sharpness. To do this, hold down the Alt button while you adjust the Masking slider. Notice the image turned from color to a strange black and white. The white lines show what areas will be sharpened while the black indicates what will not be affected.
Because noise is most easily noticed in darker areas, I zoomed in on a shadow area to check if I needed to apply some noise reduction. In this instance, there was not very much so I decided to increase Luminance just a touch to reduce what was there.
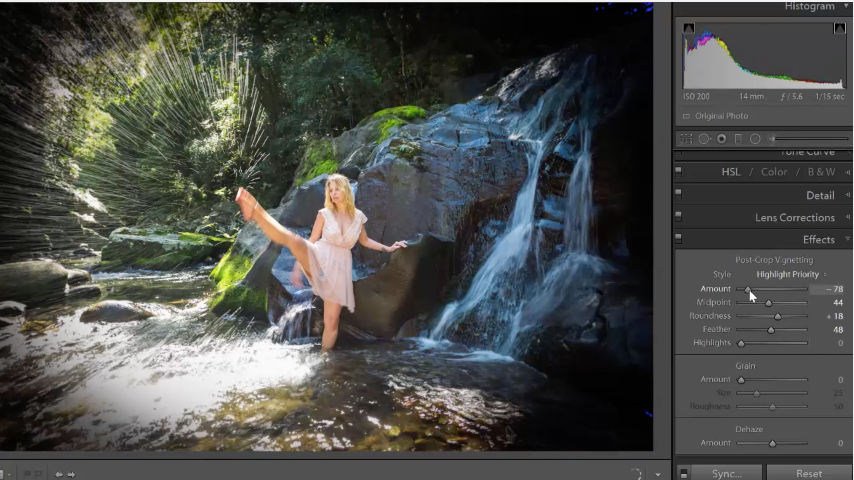
Next, I wanted to be sure to draw the viewer’s eye to the model and spray so I used a subtle amount of vignetting, which is applied with the Amount slider in the Effects panel.
Balancing the Image – Applying Graduated Filters
The basic edits in this photograph made a big difference, but I still wanted to refine it some.
As you can see, the original image and even the image I’ve enhanced thus far still feels off-balance. The shaded area on the right side where the rocks and waterfall are located is dim and too cool (bluish cast) to be appealing. The left side sunny area, on the other hand, is too bright with some highlighted areas blown-out completely.
I used one graduated filter to address the cool, shaded area on the right. Using the sliders, I adjusted the temperature to make it warmer and I increased the exposure to match the other side of the photo.
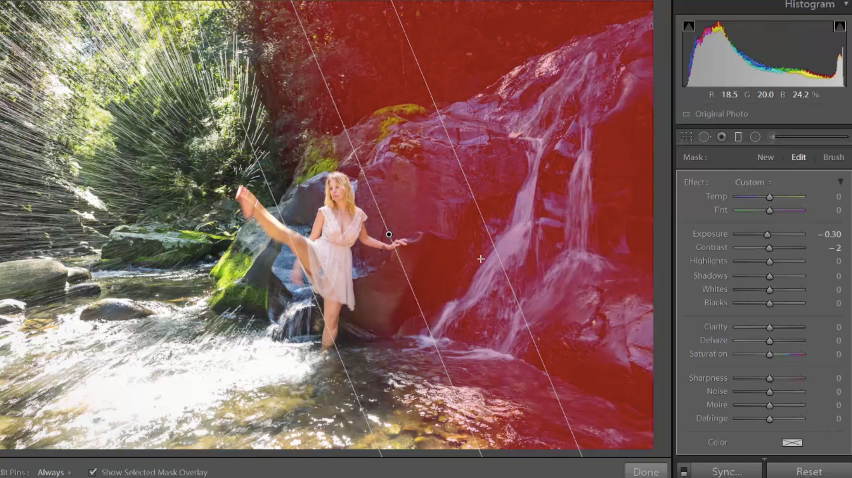
I then applied a second graduated filter on the opposite side to address the over-exposed sunlit areas. I used the sliders to bring both the exposure and the highlights down a bit.
By increasing exposure and warming up the right side and decreasing exposure on the left, the image is now much more balanced.
Let’s Summarize
This tutorial shows that, with some basic changes, a few enhancements, and some graduated filters, an over-exposed ‘yuck’ photo with an out-of-whack white balance can be transformed into a vibrant, refreshing, and well-balanced image.
Let’s look at the changes from start to finish:
- Applied Johny’s “Great Place to Start” Lightroom Preset
- Corrected the white balance; changed it from As Shot to Auto for a start
- Made some additional adjustments from the Basic panel including exposure, contrast, highlights, shadows, whites, and blacks
- Also made some tweaks to vibrance and saturation
- Used the Masking slider from the Detail panel to sharpen parts of the image
- Applied some vignetting from the Effects panel
- Applied a graduated filter to brighten and warm up the shaded areas of the image
- Applied a graduated filter to adjust for the over-exposed sunny areas
Leave me a Comment
How have you dealt with photographs shot in extreme lighting situations?
I’d love to read your stories in the comments below.
More of these types of images are also available on my website at https://brentmailphotography.com/
Cheers,
Brent
FREE IMAGE EDITING COURSE
Learn to Edit an Image in Just 10 Days!