How to Take an Image From Great to Wall-Worthy in Minutes!
![]() Hey guys! Brent here. Last week, in Part 1 of this quick tip series, I showed you all how to take an image from dull and lifeless to great in literally just a couple of minutes. I used my friend Johny’s Ultimate Lightroom Workflow Preset Bundle and it sure did make a world of difference.
Hey guys! Brent here. Last week, in Part 1 of this quick tip series, I showed you all how to take an image from dull and lifeless to great in literally just a couple of minutes. I used my friend Johny’s Ultimate Lightroom Workflow Preset Bundle and it sure did make a world of difference.
This week, in Part 2, I I’m going to show you how to take that same image and make it even better with some advanced editing techniques. These aren’t hard – they’re pretty simple, actually – but they make a dramatic difference in the final photo.
Watch now to see how to get from great to a stunning, wall-worthy, picture with just a little bit more enhancement.
Also, this is your last chance to get Johny’s bundle at a discount so be sure to get it while you still can!
In this episode:
(01:13) – Lone Pine edit
(02:13) – How to make the image really pop
(06:08) – Radial filter before/after
(07:05) – Graduated filter before/after
(08:15) – Mask before/after
(09:27) – Get the bundle
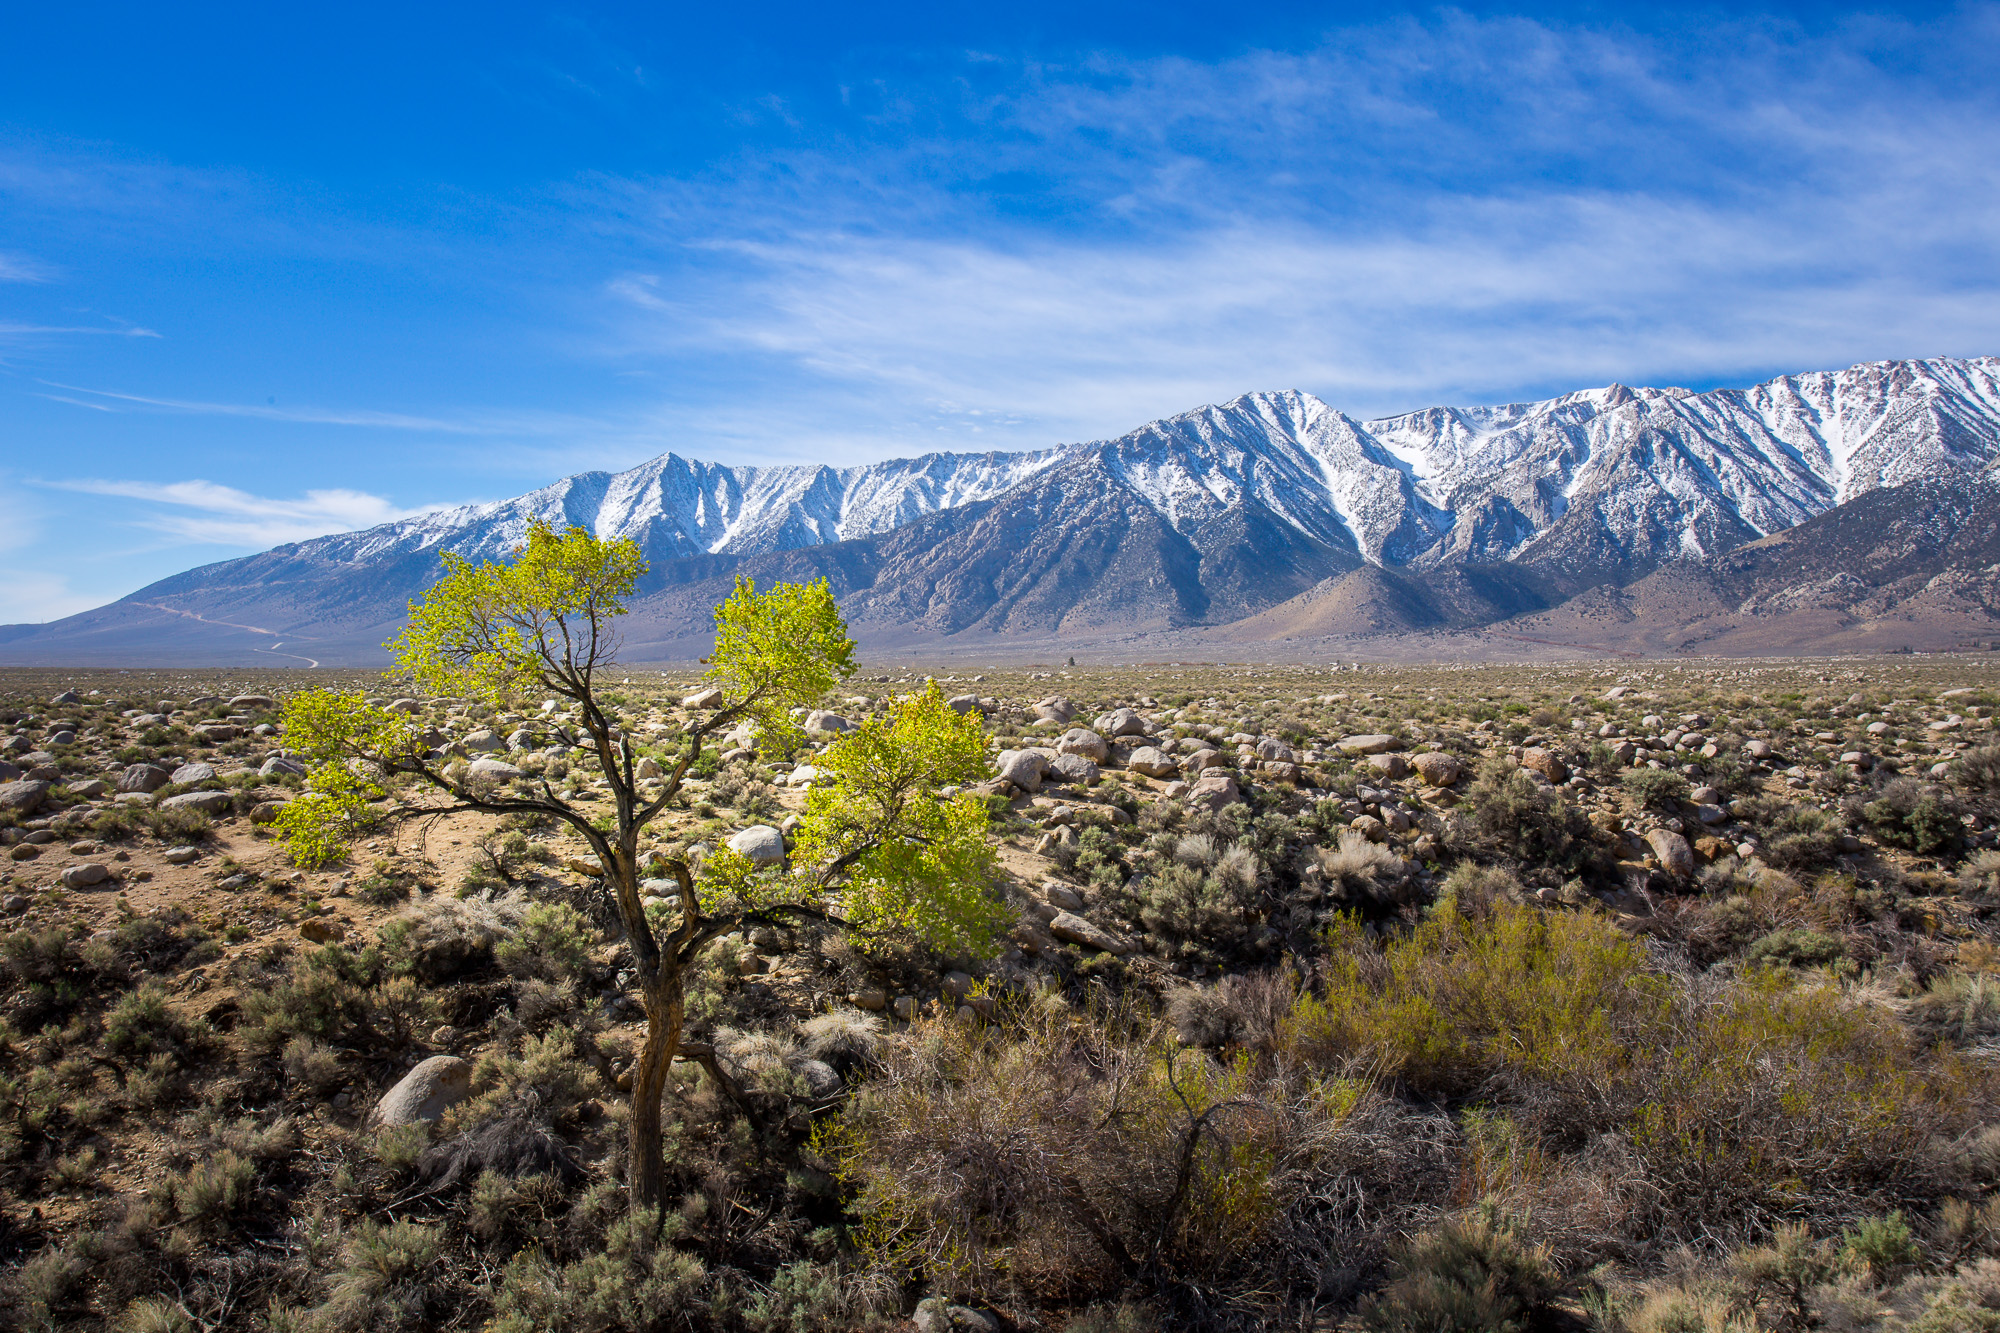
Lone Pine Takes a Stand
As I mentioned in the introduction, I was able to use Johny’s preset bundle to get a really great foundation image. But there’s more I can do to really kick it up a notch, making it wall-worthy.
Notice that in the image as it is now, the tree sort of blends into the background. But I want this tree to stand out, grab the viewer’s attention, and draw them in. Then their eyes can move on to the mountains and sky.
The best way to do this is to make it my point of interest by separating it from the background.
Sharpening the right things!
The first thing I do is adjust the sharpening: We sharpened the image last time, but I want to remove that from some of the areas, like the sky. I only want it in only the tree, mountains and some of the foreground. To selectively sharpen, I use the making feature by holding Option and dragging the slider to the right. The white is what will be sharpened and the black will be left alone
Making the tree POP
Now that I have the sharpening cleaned up, I can move on to making the real magic happen to the tree:
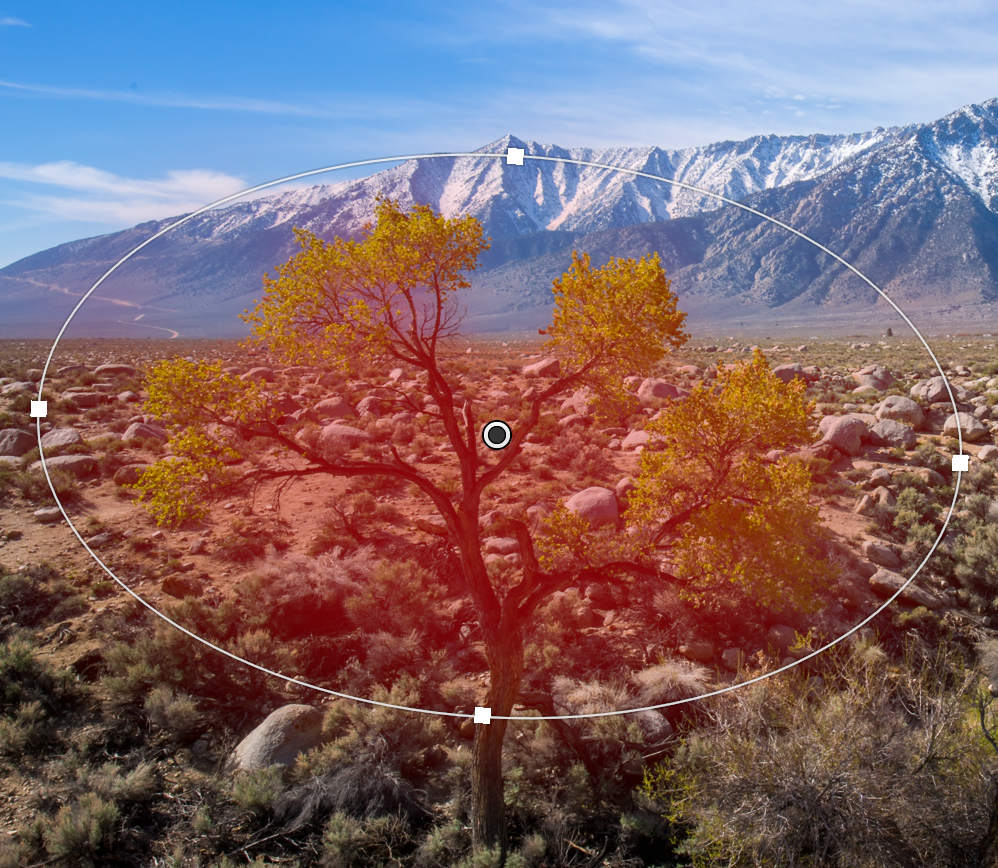
- Apply the Radial filter to the tree: Choose the radial filter tool and drag it over the tree. Click O (the letter, not zero) to show the red mask of what will be affected. In this case, I need to invert the mask so I click the Invert Mask option.
- Adjust the color and brightness: Make the leaves more green by moving the Tint slider toward green
- Increase Exposure just a bit, not too much – about .50
- Increase Contrast
- Increase Shadows
- Increase Clarity
- Increase Saturation – remember a little goes a LONG way
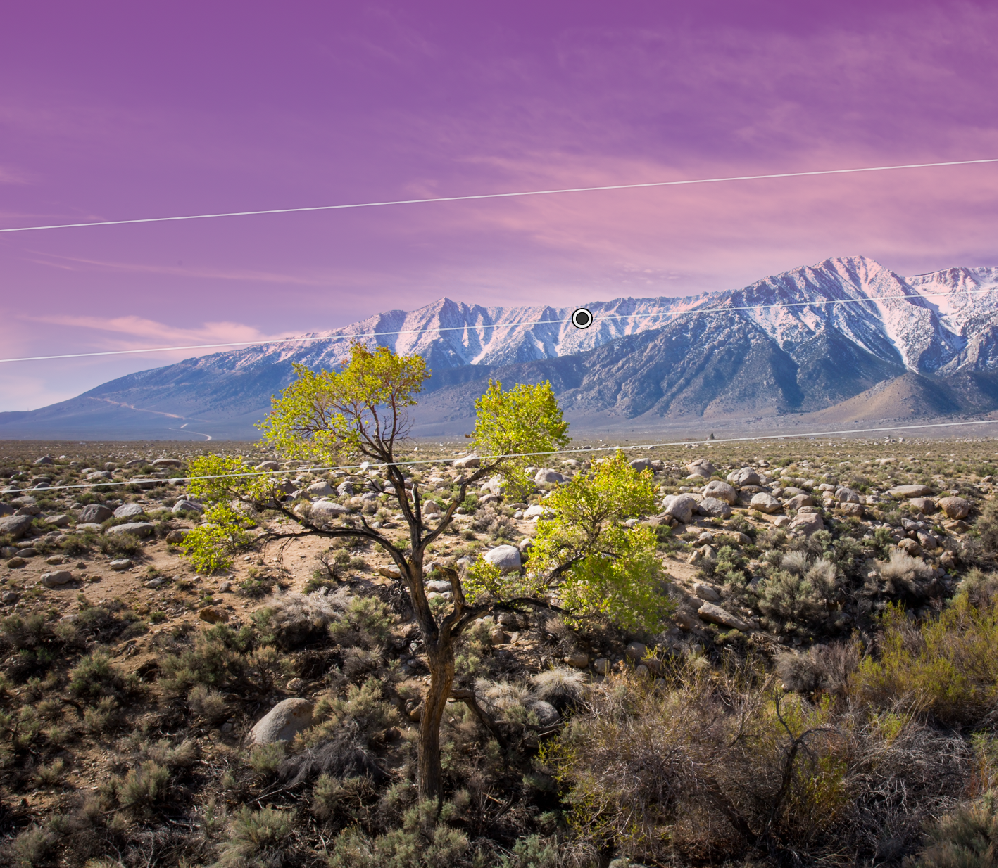
Brush tool magic
Doing all this is great for the tree and makes a big difference. But because the radial filter also covers the mountains, my changes have made the mountains more green in that area, which I don’t want. I want to keep them blue, and luckily, there is an easy quick fix for this.
- Click the Brush tool
- Go to Erase
- Make sure Auto Mask is checked and type O to show the red mask. This will make it much easier to remove the filter from the desired areas.
- “Paint” out the undesired areas
Everyone loves a BLUE sky
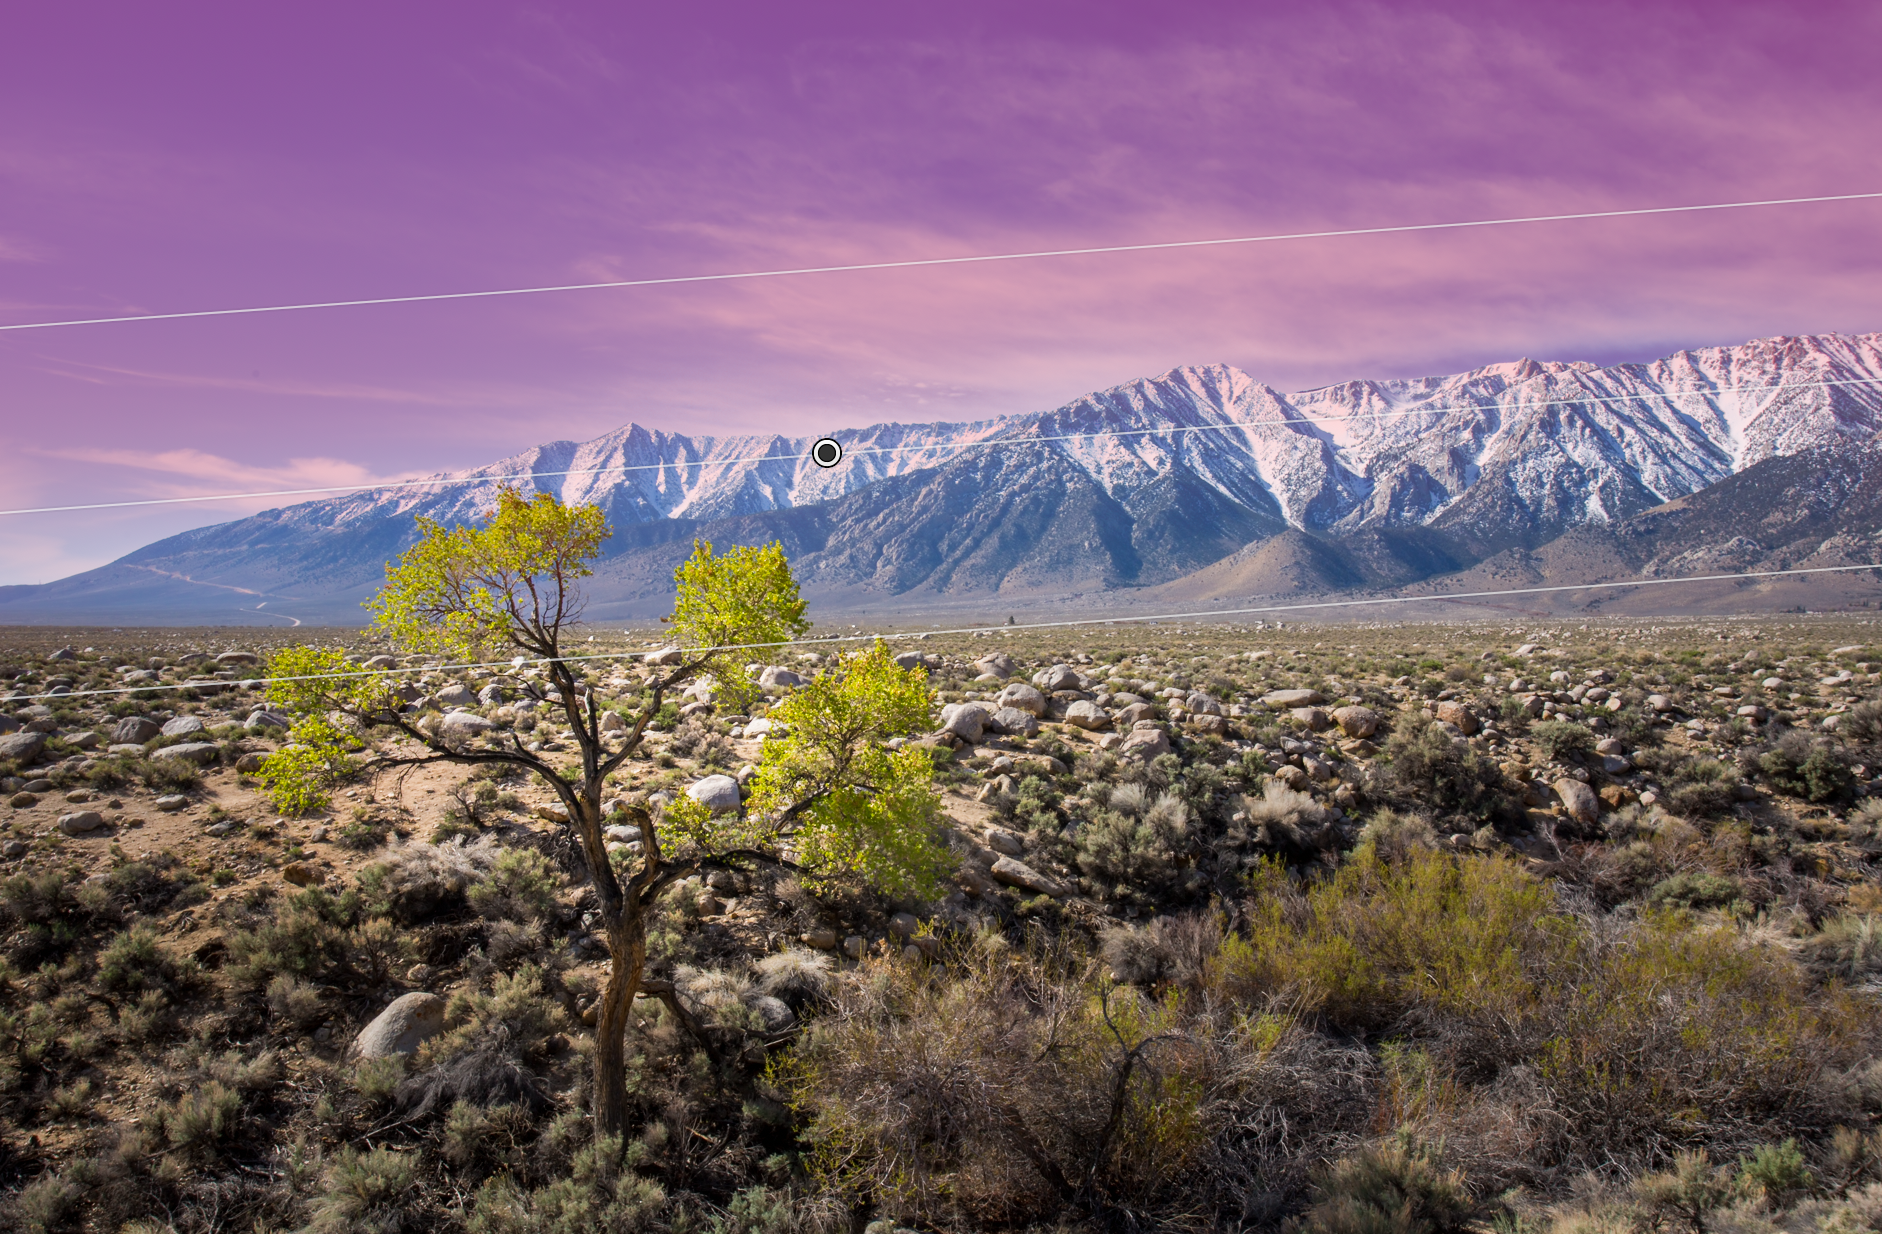
Finally, even though I used a circular polarizing filter to decrease haze when I took the picture, I want to increase the blue, making the sky POP. Using the Graduated Filter is a great way to do this:
- Choose Graduated Filter and drag it from the top of the photo from the top down toward the horizon.
- Increase blue of the sky by adjusting the Temperature slider toward the left (cooler).
- Decrease highlights using the slider
- Once again, the filter affected parts of the image I didn’t intend for it to, so I need to use masking again to correct this.
- Select O to see the red mask and paint away the mountains, leaving just the sky. I also removed it from the tree since effects stack on each other and I didn’t want to adjust my previous edits.
How I photographed this scene
Because the scene was so breathtaking, I wanted to be sure that I used a wide depth of field, meaning I wanted the image to be in focus from the tree all the way to the mountain range.
To do this, I used my 17-40mm wide angle lens (zoomed in a little at 29mm) and set my aperture to f/16. These settings allowed me to capture the breadth of the scene while keeping focus from fore to background.

Summary
So, as you’ve seen, Johny’s Ulitimate Lightroom Workflow Preset Bundle can help you streamline your editing process and save you a ton of time. And there are also more advanced techniques you can apply to take your photos to the next level:
- Increase sharpness and reduce noise
- Use the Radial Filter to make the tree POP
- Use the Graduated Filter to make the sky a more vibrant blue so that it stands out
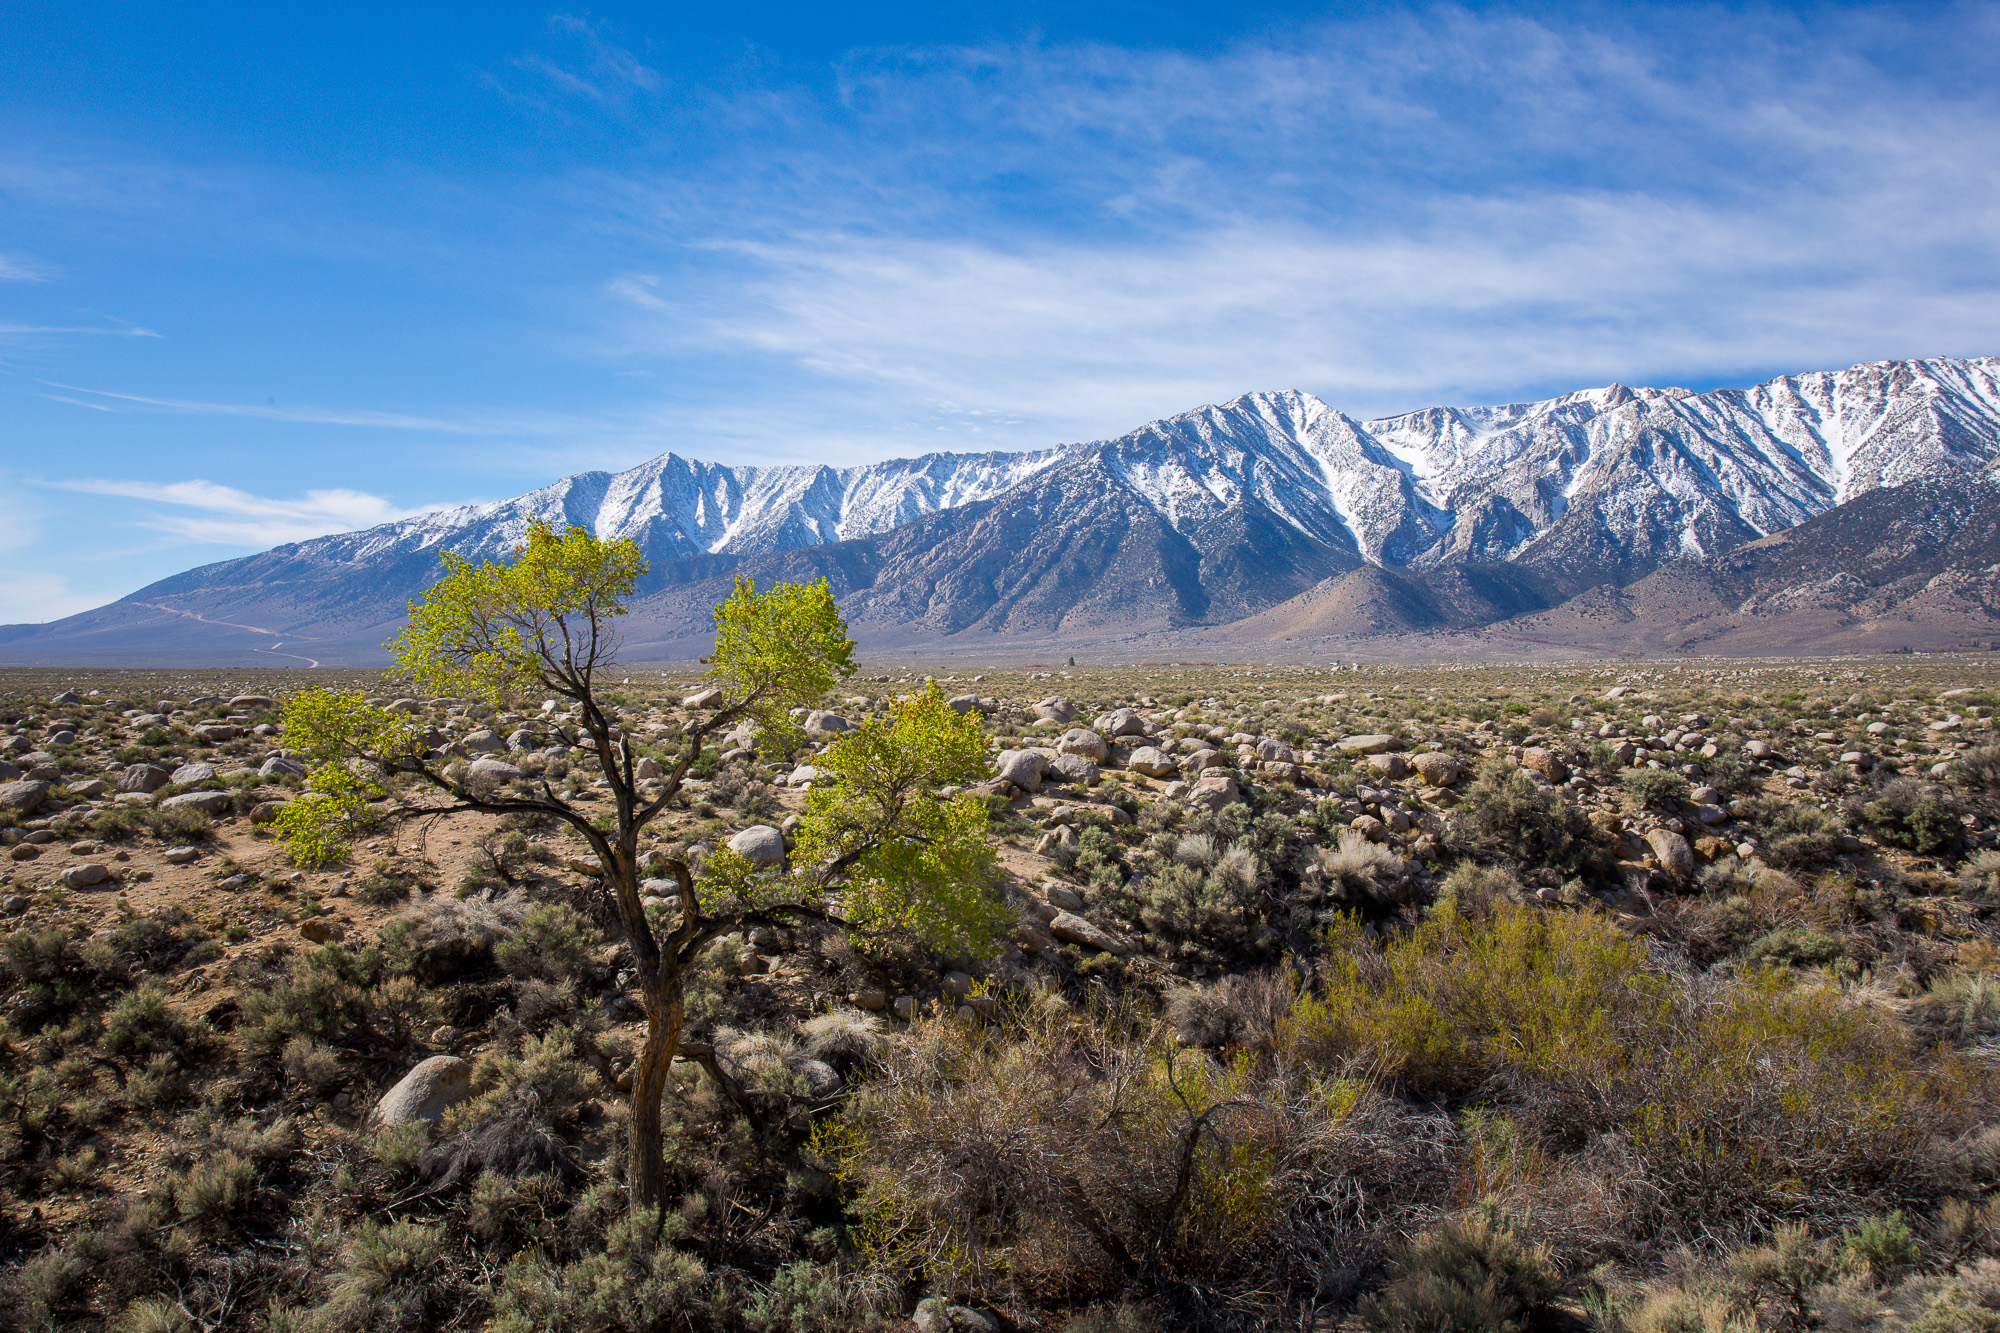
Above: See the difference? Left is before and right is after I did the advanced edits – Click images to see them LARGE.
And there you have it! I hope you enjoyed this simple, two part quick tip series.
Related articles
Did you enjoy this article? You may be interested in these related articles, too:
- [Part 1 of 2] Lone Pine Quickie!
Making Your Lightroom Edits Quick & Stunning Using This Smart Workflow - Give Your Photos a One-Two Punch Using Framing
Learn to use a powerful composition technique to make your subjects stand out! - Antelope Canyon Edit using LR Workflow Presets
How to make your photo editing quick and fun with LR presets.
Remember, this is your LAST CHANCE to grab this amazing workflow system at the pre-launch discount! Click HERE to grab it now at 52% off!
Great video as usual Brent! I did wonder though why you didn’t try to reduce the exposure on the rocks etc behind the tree when you used the radial filter? To my eye it’s not only the tree that is highlighted but also the immediate landscape behind it.
Cheers
Mike
Great tip – yeah might I should have reduced the brush even more. Brent