What is the fastest way to find your landscape photography winners?
I’m currently taking this Awesome, brand-new course by Johny Spencer (aka – lightroom GURU), called Lightroom Essentials for Landscape Photographers, and after taking a few lessons I realized that my older ways I was doing things were not the fastest or even the most efficient,
So, I wanted to share a few quick tips with you guys – so that you can improve your workflow, just like I have, and save heaps of time.
Click here to checkout Lightroom Essentials For Landscape Photographers
Highlights from this Video:
De-cluttering the Interface
How to declutter the interface so that you only see what you need to see.
This is the first thing you need to do when starting with lightroom, otherwise this awesome program can seem a little overwhelming.
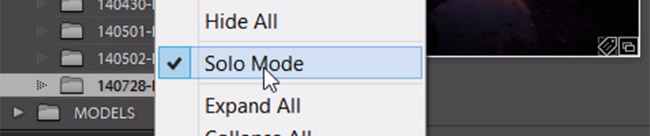
1:20 Solo Mode
Why I love this little trick for making life so much easier!
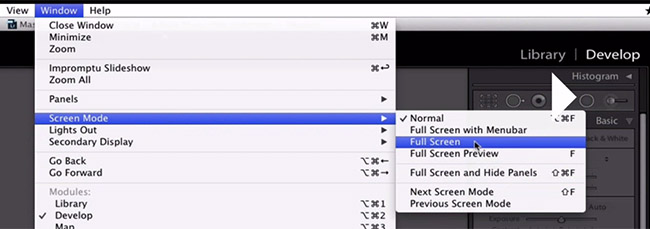
2:02 Full-screen mode
This is the mode I have my lightroom setup to, all the time. You get maximum screen real-estate for you amazing landscape images – Winner!
Choosing the winners
2:45 Pick/Reject Fast
The method I learned from Johny, how to pick and reject really fast. Check it out.
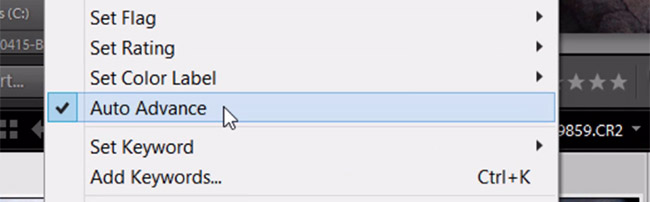
3:10 Auto Advance Mode
3:30 X=Reject
3:48 P=Pick
Want to learn more about image editing and post processing?
Grab My FREE Post-Processing Course
Please leave comments below.
Have an awesome day – Brent
[hr]Here is the story behind this course…
But before I get into it, I need to make a confession.
It’s a little embarrassing!
I WAS WRONG! (Thinking that I was a Lightroom expert)
I have been using Lightroom for quite a few years, and I considered myself to be an advanced user when it comes to Lightroom and landscape photography.
After all I have imported and post processed thousands of my landscape images in LR (and sold quite a few), surely I know everything there is to know, right?
Wow, was I wrong!
Once I started taking this course, I realized that I was stuck in my old (less-efficient) ways of working in LR. I was doing things that took 3 times as long as needed, and I thought that I was really fast!
Why didn’t I know this stuff?
I hadn’t even realized that there were shortcuts in my workflow. (by now you probably realize that I do not like to waste time, and if there is a better way to do something – then I want to know what that is.)
Here is the good news…
You can save heaps of time post-processing your images, because there are shortcuts to almost everything you can do in Lightroom. Not only that, but there are much better ways of doing things, more efficient workflows that you SHOULD be using to make the most of your landscape photography!
So, how did I realize that I was NOT a lightroom guru?
Here is the story…
THE NEED TO CREATE A NEW LIGHTROOM COURSE
Picture this: camper-van, South Island of New Zealand
There I was sitting in a freezing-cold camper-van, in the middle of no-where (half way to Milford Sound, in the wilderness), at night trying to post process some amazing images I had taken in the previous 3 days.
I was frustrated because I only had about 1 hour of battery life left on my laptop and I needed to get a few hundred images, downloaded, sorted and I needed to choose the best ones, post process them, insert my water-mark – ready to share on social media.
It was taking me forever! There was no way I was going to complete this task before my laptop died! (we were free-camping with no power).
Fortunately, my travel companion was a lightroom guru!
Johny Spencer was travelling with me, we were filming a new Landscape Photography course with Jay and Varina Patel in beautiful New Zealand. We were also taking heaps if amazing landscape images!
I knew that Johny was pretty fast at Lightroom, but I didn’t realize how fast he actually was.
By the time I had imported my images, cataloged and keyworded (metadata) them, he was done with all of his!
Johny had already downloaded, keyworded, sorted, picked the best images (and discarded the bad ones), post-processed 2 or 3 of his best and added his watermark, ready to be shared on social media.
This included adding a few advanced things like, cropping, lens correction, sharpening and using the gradient tool to darken the sky and remove (cloning out) a few distractions.
How did he do it so fast? What was I doing wrong?
I was super impressed!
I NEEDED TO KNOW HIS LIGHTROOM SECRETS!
He showed me a few things – Johny is like that (he loves to share and help people, and he is super passionate about landscape photography).
I said “Dude, you need to record all of this stuff and create a course so that you can help other photographers like me!”
Johny listened to my advice – and with a little prodding by me, here it is…
LIGHTROOM ESSENTIALS FOR LANDSCAPE PHOTOGRAPHERS
Are you a landscape photographer who wants to make the most of your landscape images, in an efficient, fun and creative way?
Are you already using lightroom (LR) to do this?
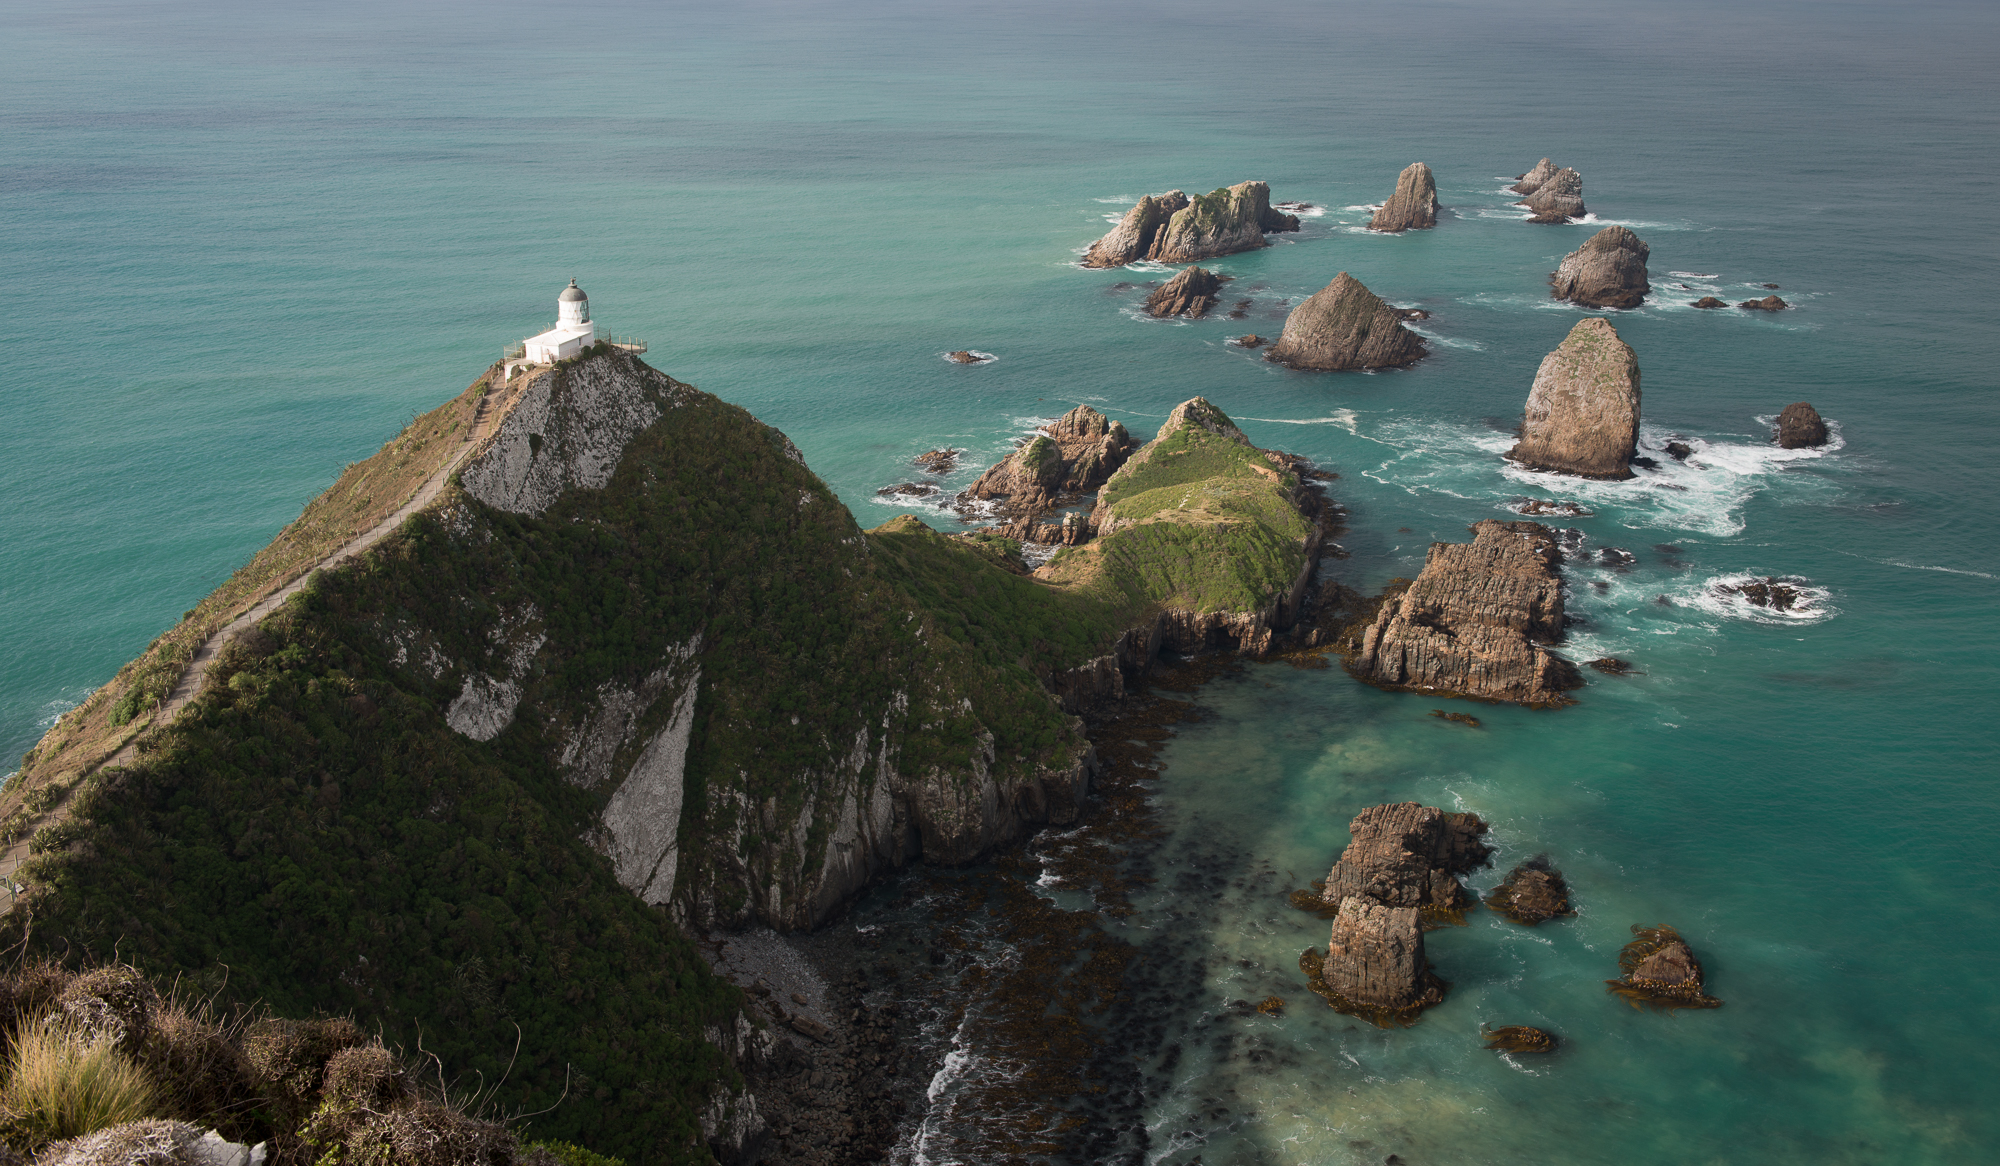
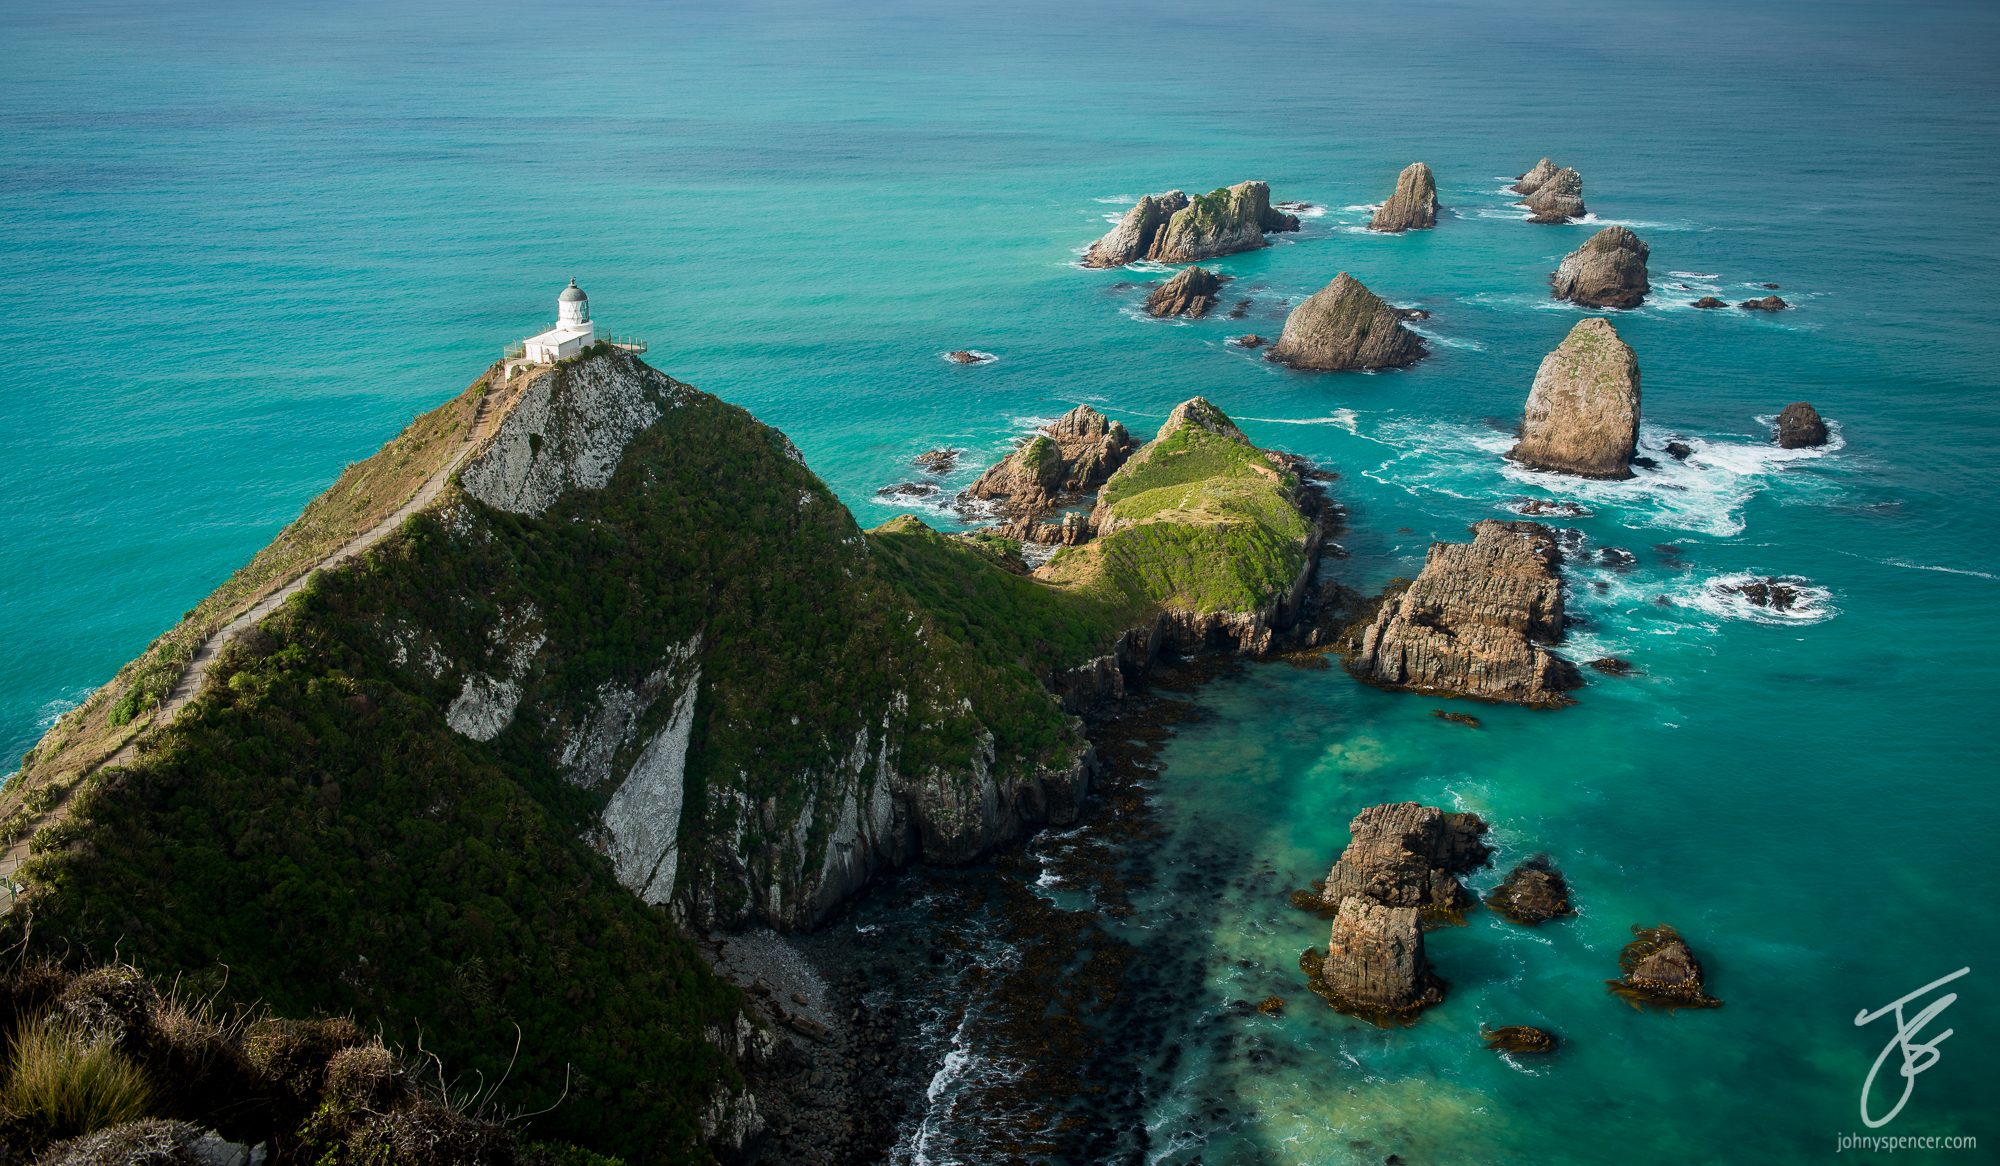
Here is an example of what lightroom can do in around 5 minutes or less! (with Johnys LR course you can do the same)
Before
After
JOHNY SPENCER – LIGHTROOM GURU
So, who is Johny and why do I consider him to be THE Lightroom Guru.
Johny is an expert (I call him a LR GURU) because he works with Lightroom everyday in his job, he lives and breaths this stuff.
He is a full-time pro photographer for National Parks and Wildlife in Australia which means that he shoots and then catalogs & post-processes thousands of images in LR eveyday.
These images then appear in print and online media campaigns to promote wilderness areas for National Parks & Wildlife.
Johny is a passionate landscape photographer, and has figured out ways to maximize his time with some ingenious LR short-cuts – I guess he has limited time to process thousands of images!
He is also a great LR teacher (he showed me a few short-cuts in 5 minutes that saved me hours of post-processing time) and overall nice guy!
Enough about Johny (don’t want this to go to his head) let’s talk about this awesome course.
WHAT I LOVE ABOUT THIS BRAND NEW LR COURSE
1. Bite size lessons – clear, concise and easy to understand.
If you are like me, and have a limited attention span, then you are going to love this course. Each lesson is short and sweet – around 2 minutes or so, packed with great info. (Some of the longer lessons have even been broken up into seperate shorter lessons.)
Basically, Johny gives you just the stuff you need to know, there is no fluff, or waffling-on about something un-important, no time-wasting!
I have found these lessons very easy to understand and implement from the get-go. What I did was implement what he taught me right after watching the short lesson. I have found this to be the best way to make the information stick in my head.
I even love the intro part “in this lesson you are going to learn all about …” and then the very short logo swish, then straight into the lesson – LOVE the way he is not wasting anyone’s time with a long advertisement about the course I just bought. (I have noted this and will implement this feature in all my new videos too)
2. Step-by-step instructions that are well planned out.
Right from the start Johny teaches us about removing distractions like de-cluttering the interface.
I felt in-control right from the beginning, no longer having all those menus and icons distracting me from what I need to do.
Much thought and planning has gone into this course: Things like the size of the video (icons and menus are large and easy to read) and how to setup your folder structure so that you never need to re-link images again are a huge relief for someone like me who is on the road and shooting and backing-up to different external hard-drives.
3. Shortcuts and time-saving workflow.
How to pick or reject over 100 images in about 60 seconds flat!
Tips and tricks like these are saving me heaps of time, plus jumping from G-grid mode (library module) to D-develop (develop module) in a few key-strokes – yeah now that’s the time-saving stuff I’ve been after!
Here is one that I love. Use the backspace key “\” for a before and after look at the image you are post-processing in the develop module. Is it turning out to be an amazing image – just like when you took it?
4. Full edit from start to finish.
How cool would it be to look over a LR guru’s shoulder and watch him post process an image from start to finish?
In this course Johny included 5 case studies, where he does a complete image edit from start to finish on a wildlife image, blue sky image, sunrise, black & white and a macro image.
These lessons are probably the most valuable to an intermediate Lightroom user – or even an advanced user like me – totally worth the price of the course just for these 5 case studies alone.
EVERYTHING YOU’LL EVER NEED IS INCLUDED IN THIS COURSE
This course has been designed to give you everything you will ever need to maximize your landscape images and come away with stunning shots.
Starting from the very beginning and then building on the skills you have learned.
The course is broken up into 7 major sections.
Here are a few of the things I like from each section…
1. Getting Started
- How to setup Lightroom right from the start.
- Single Master Image Folder – how to setup your folder structure in a logical and time-saving way.
- Simplifying the interface – removing distractions and de-cluttering.
- Different Screen Modes to view your images – I love Solo Mode!
2. Importing
- Metadata pre-set – and how to save time with every import.
- Copy, move or add – how Johny does the import really fast!
- Left & right panels – which features to turn on and which to ignore!
3. Library Module
- Looking at folders and Collections – How to set them up and why you need collections
- Assigning metadata and keywords to help you find images really fast!
- Pick and Reject – this is the feature that has saved me so much time! Johnys Super-Fast way of picking and rejecting images.
4. Develop Module
- How to setup the develop module to minimize distractions and which feature to use to maximize your time when post processing an image.
- Lens correction panel – why have I not been using this on all my images?
- Spot removal and graduated tool – how to use them to give your images much more punch.
5. Exporting
- How to apply your watermark before sharing on social media – no more stealing your images!
- Exporting tips and tricks!
6. Case Studies
- I love this section because Johny reviews everything you have learned up to now – and he applies it to 5 real-life case studies. Wildlife, Blue Sky, Sunrise, Black & White, and Macro image edits.
- Plus – you get to download the original RAW images and edit along with Johny – how cool is that?
7. Bonus Videos
- Keyboard shortcuts and how to save time when using Lightroom.
So, I talked to Johny and convinced him to give you guys are really good deal on his brand-new course.
SPECIAL DEAL JUST FOR YOU
All you need to do is go here http://johnyspencer.com/lre
Add this course to your shopping cart and then use this promo code for a massive savings.
BMP-42%off
Thats 42% off the price! You save $31.50
AWESOME GUARANTEE
This course comes with a money-back guarantee for 60 days. I personally know Johny and he will honor this guarantee.
So, if you are a landscape photographer, who wants to save time and maximize your landscape images then this is the course is perfect for you.
For me, this was an easy choice!
Brent
Hi Brent,
Thanks for sharing with us that great lightroom tip, i beleive this is going to save me a lot of time
Quick question, how do i remove all the X that i’ve applied after i’ve finished my workflow?
Regards
Simon
Thanks Simon.
What I do is create a collection with all the “Picks”, that way I can see them in the develop module. These are the ones that I may develop, the rejected stuff I do not want to see again. Johny explains this really well in his course – go check it out. Brent