Lightroom Image Retouch to Achieve that Magic Feeling
In this video tutorial you’ll learn how to enhance the photo that you’ve taken with your camera using a few simple techniques in lightroom. I’ll show you how to make the colors pop out vibrantly and make the image more realistic. Enjoy!
Highlight of this video:
2:00 – Image color and highlight editing
2:34 – Clarity & vibrance sliders (not too much!)
3:15 – Luminance to darken the mountains
3:40 – Detail sharpening and noise reduction
4:14 – Lens correction (love this one!)
5:07 – Effects editing
6:18 – Radial filter – the secret weapon!
Lightroom Photo Editing
So why do we need to edit this image?
Possibly the most important part of photography is to create an emotion within the viewer just by looking at your pictures, and the original image was very un-inspiring to me.
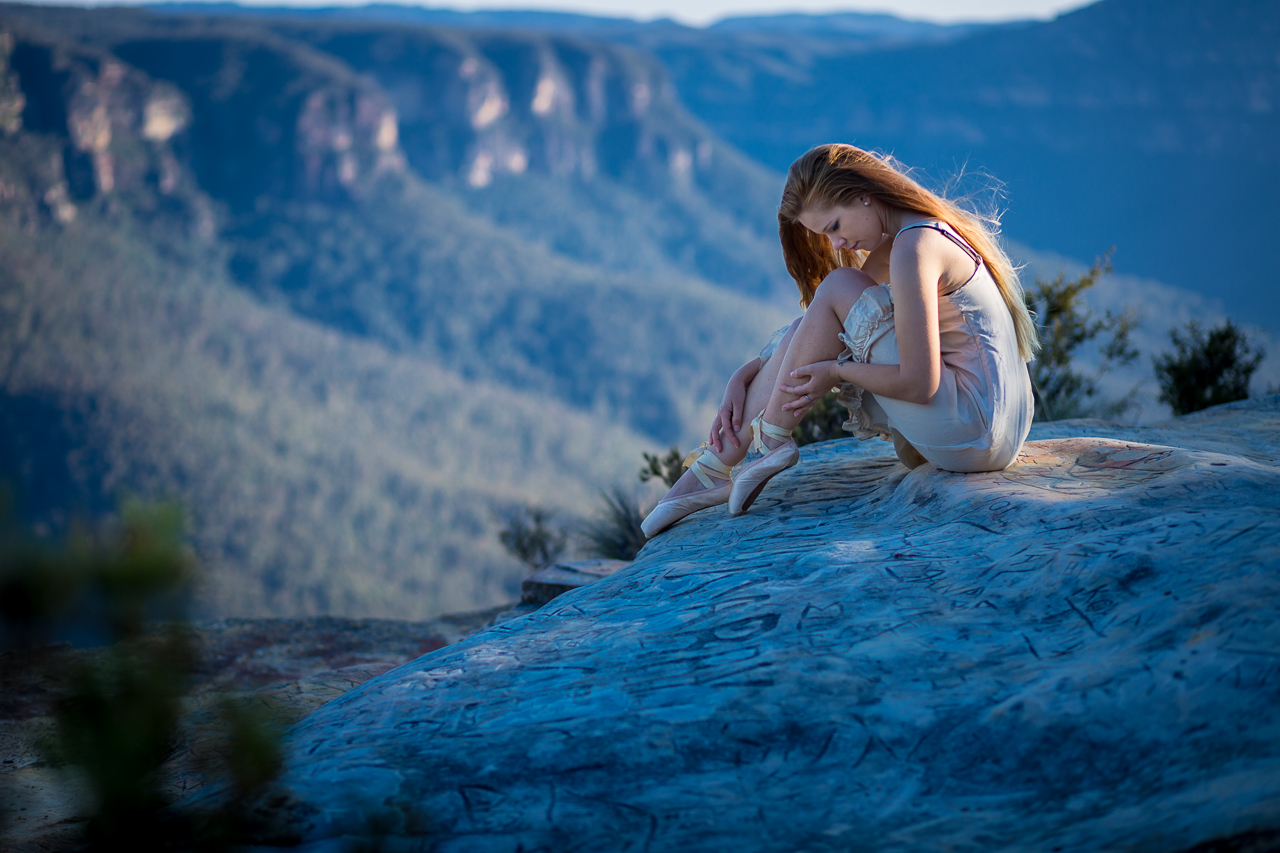
The goal is to produce an image that has impact, and conveys the feeling you had when you were taking the shot. When we did this photoshoot with Lara, it was early in the morning and it was cold. Her face was a bit purple just because of the color temperature in the camera.
Skin tones are very important in model images!
I wanted to make her skin tone look really good eliminating the imperfections and capture the coolness of the morning so when people view this image they would also feel the coolness of the morning while the sun gently kisses Lara’s skin. Below is the finished product of my Lightroom photo editing. Click on it to see it LARGE!
Keep it Simple
When editing photos like this, make sure you don’t over do it. Remember the goal is to enhance and not destroy the image by overdoing the final edit. I like the saying “Keep It Simple Stupid” or otherwise known as “KISS”.
When editing a photo, it will help if you try to recall the mood when you did the shoot.
- How did you feel on the shoot?
- Was it cold or hot?
- Was it a serious or playful scene?
- Was it a loud, outgoing, free spirited type of day?
Remembering the mood makes it a lot easier & more enjoyable for me to edit these images.
Want to learn more about image editing and post processing?
Grab My FREE Post-Processing Course
Hope you enjoyed this tip. Please leave me comments below.
Cheers, Brent
thanks Brent. very useful tips. If you had to choose Lightroom or photoshop which post editor programe could you not live without? Edward
Love LR for quick edits – but PS has it’s place for blending multiple images etc. I could live without PS though I guess – if I had to. B
Thanks Brent – a few times you mentioned using the backSPACE key to toggle before/after where you meant the backSLASH key. Perhaps you may wish to add a few YouTube annotations to clarify this. Otherwise, very well done and I’d even like the video to cover the excellent crop on the horizon.
Woops. Yes thanks for picking that up Michael. Also great talking to you the other da . Cheers. Brent
Awesome information! I love that you explain the radial filter so easily.
Thanks Kim. B
Thanks for some useful guidance on Lightroom. As regards the picture I have two observations: My eye is drawn to the lightest part of the subject (model), which is her back but I want to see her face. The blue haze in the distant hills is quite natural looking but the blue of the foreground rock is not. The morning temperature would be cool but the rock will be lighted by the warmer coloured sky light and I would expect the rock to be a very similar colour temperature to the model but it is not. We all have different taste but the blue rock spoils it for me! Your hints and tips are clearly delivered and I enjoy your videos which add to or consolidate earlier learing. Thanksamillion.
Thanks for adding your thoughts Richard. Cheers, Brent
Hi Brent,
Thought this was great especially the use of the radial filter, will be giving this a try. Thanks for your time and effort in making these tutorials.
Yeah love the radial filter. Glad you enjoyed this lesson – please share the love! Brent