How to make architectural images look even better by using the lens correction tool in Lightroom.
Watch and learn as I take the tallest building in the world and “Bend it like Beckham!
Hey guys, following on from my last blog about how to get rid of haze in your images, today I want to share with you some really cool tips I learned about correcting architectural distortion.
Watch the video here:
Lens Distortion
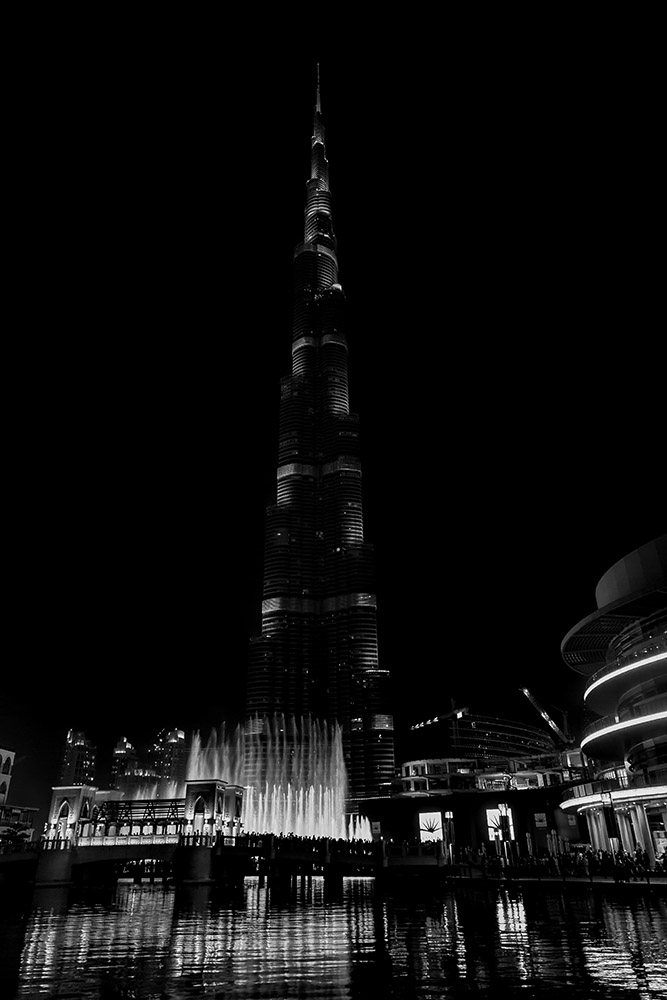
Whilst in Dubai with my family, I couldn’t help myself from photographing the tallest building in the world; the Burj Khalifa. However as you can see, the buildings in the image are leaning inwards with obvious barrel distortion. This curvature comes from the wide angle lens I used and from the 45 degree inclination I was positioned in. It’s hard to grasp the sheer scale of this constructual giant, near impossible to fit into one frame!
Correcting the Problem
My main concern with my shot was that I would lose a sense of reality with the surrounding vertical lines leaning in. So I opened up my image in Lightroom and instead of clicking on ‘Enable Profile Correction’, under the ‘Profile’ tab (which automatically fixes certain aspects), I disabled this button from use.
Why? Well, I’d like to share my top tips with you and a much better way of controlling your edit from distortion.
I went to ‘Manual’ in the Lens Correction tab, then focus on the vertical distortion rather than the barrel. With the slider, I can drag the bar up or down, using the grid to straighten anything vertical correctly. In this case I can use the pillars of the smaller buildings at the bottom of my shot, as a guideline for a perfect 180 degree line.
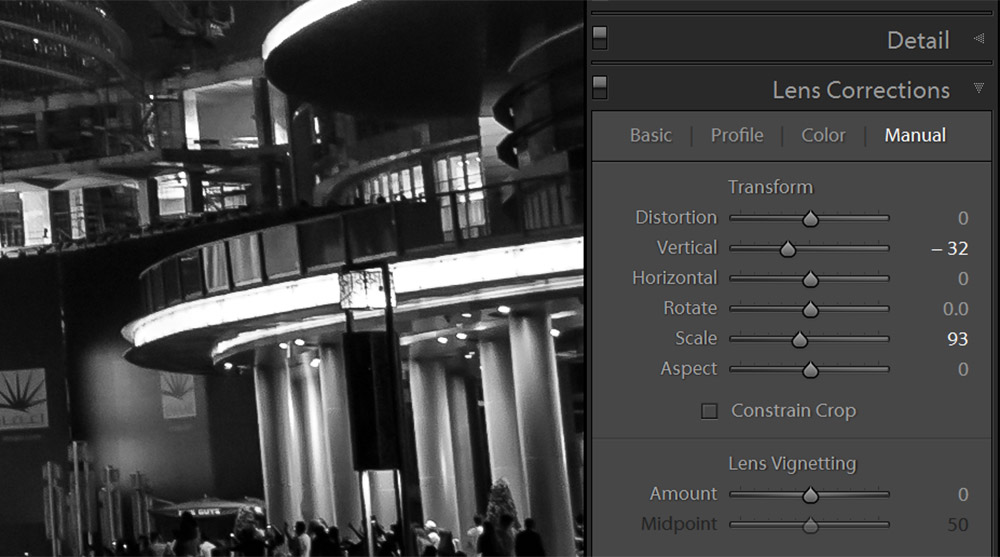
However by doing this this, we then lose the top of the Burg – defeating the object if we haven’t got the top of the tallest building in the world! This is where my top tip comes in…
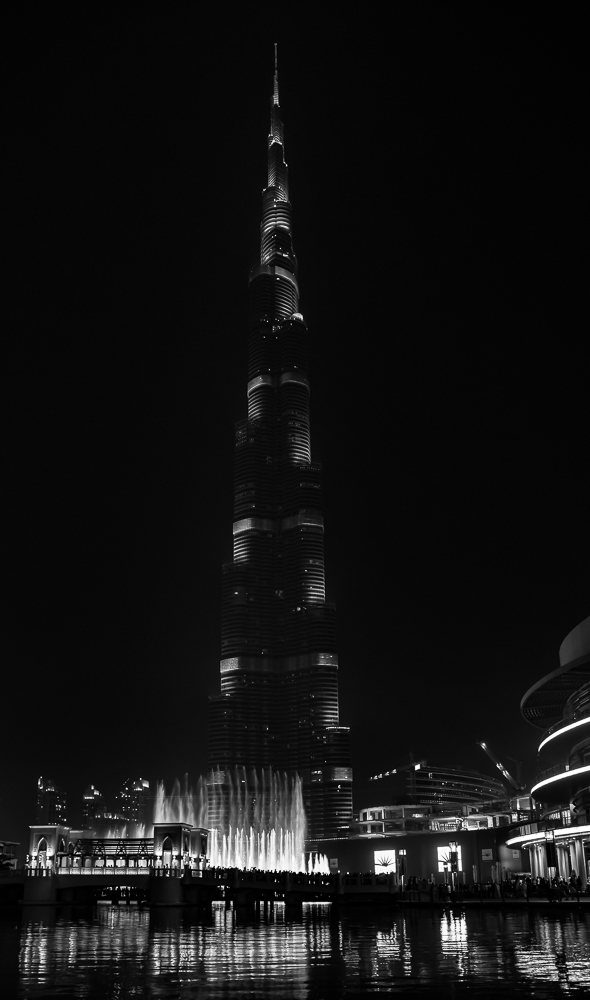
If I go back to how my image was before focusing on the vertical distortion (using ‘History’ to the left of the screen), I can ‘Scale Out’ (still under Lens Correction tab) to give myself more room to work with. Once I have more space around the image, I can then manually crop into my frame without losing the top of the Burj – rescuing my image for use!
Have you any useful tips to help with distortion from wide angle lenses and curvature of vertical lines? Please share your tricks with me in the comments below, I’d love to hear your top tips.
Join me next time where I demonstrate the useful tools of Photoshop for an image like this, exploring how to clone the sky and the background.
Summary:
- Unclick ‘Enable Profile Correction’ (under Profile tab in Lightroom)
- Go to ‘Manual’ (under Lens Correction tab) and straighten all vertical lines
- ‘Scale Out’ for more room to work with
- Crop back into the now straightened shot
Want to learn more about image editing and post processing?
Grab My FREE Post-Processing Course
Very interested in your approach to correcting building distortion in Lightroom. Looking forward to seeing ho it is done in photoshop.
Ian
Thanks Ian. Yes Photoshop has more options too. Brent